Chapter 7 ePOS Printing
Odoo supports two common POS printer connection patterns: direct printing and printing through an IoT Box. Directly supported thermal printers can print without an IoT Box, while other printers may require additional integration.
Reference documentation:
https://www.odoo.com/documentation/17.0/applications/sales/point_of_sale/configuration/epos_printers.html
This chapter uses an EPSON TM-T82III thermal printer as an example to explain the direct ePOS printing setup.
1. Enable ePOS Printer In Odoo
In Odoo POS settings, enable the ePOS printer option.
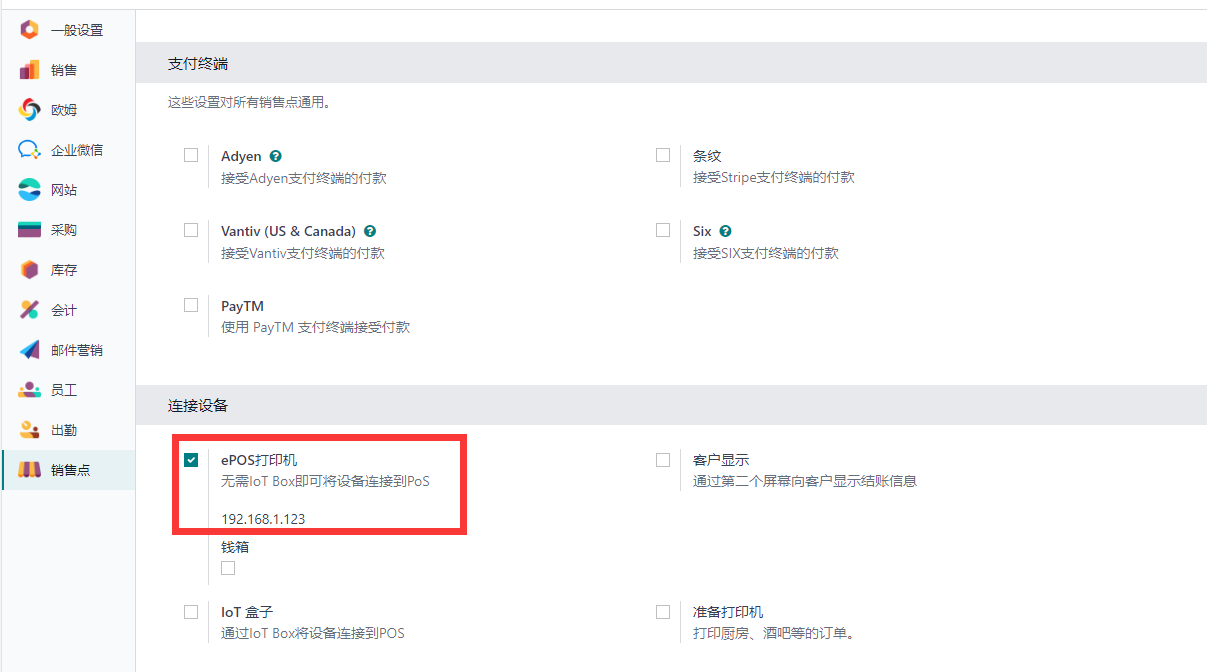
Enter the IP address of the thermal printer.
2. Force HTTPS With A System Parameter
Go to Settings > Technical > Parameters > System Parameters and create the following parameter:
key: point_of_sale.enforce_https
value: True
These are the main settings required in Odoo. The remaining steps are printer and browser configuration.
3. Create A Self-Signed Certificate
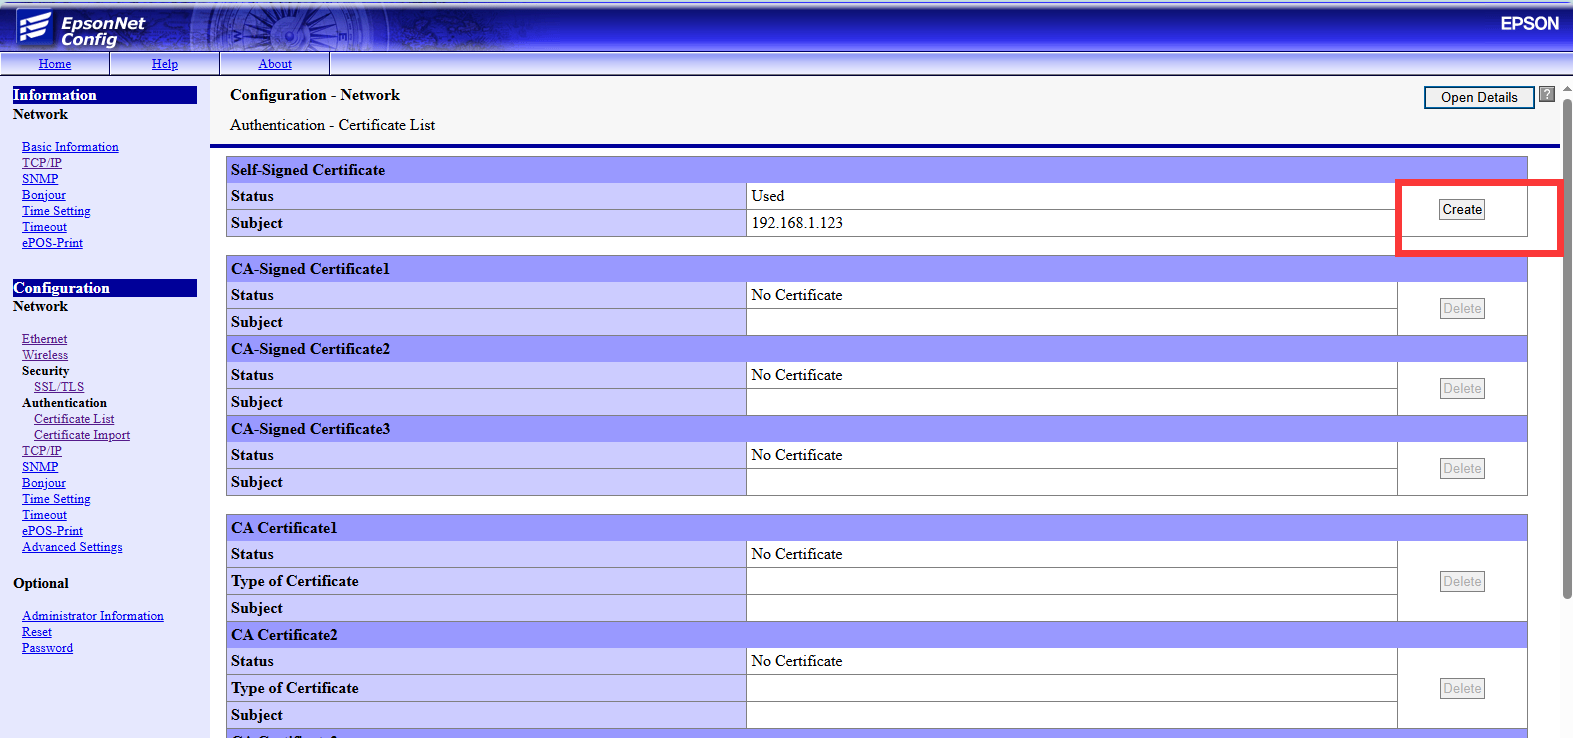
Use the account and password printed by the ePOS self-test page to log in to the printer web interface. The default address may be 192.168.192.168. After configuration, the printer and the PC should be on the same local network.
For example, assume the PC IP is 192.168.1.55 and the printer IP is 192.168.1.123.
After logging in to the printer, open the certificate list menu and create a self-signed certificate.
4. Import The Certificate Locally
After exporting the self-signed certificate, double-click it to install the certificate into the system's root certificate store.
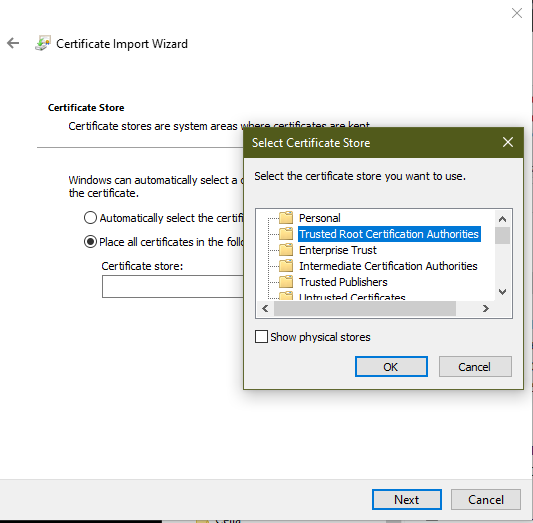
After the certificate is installed, restart the browser so the change takes effect.
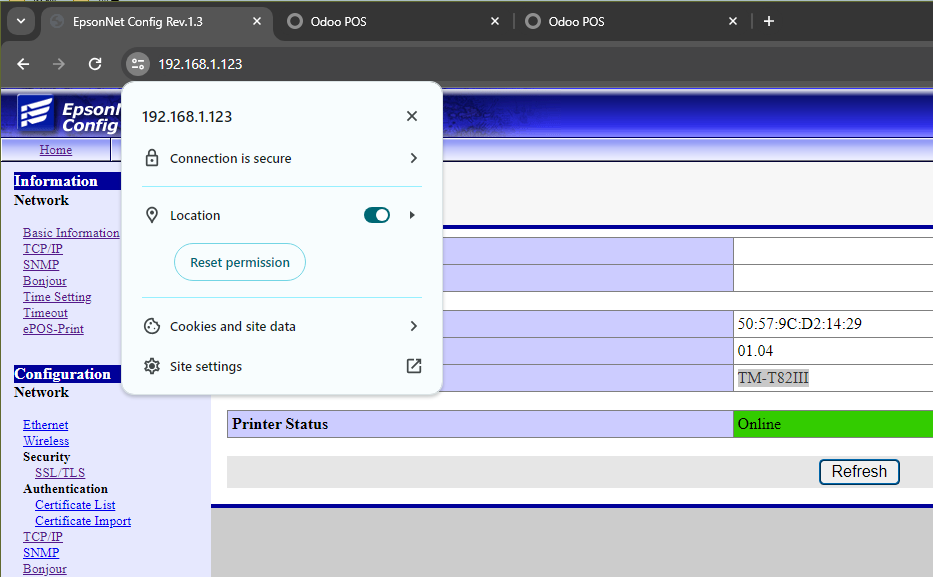
If the previous steps are correct, visiting the printer address again should show the certificate as trusted.
5. Solve Browser Cross-Origin Issues
After installing the certificate, you may still encounter browser cross-origin errors because the printer is on the local network while the Odoo server is usually on another domain.
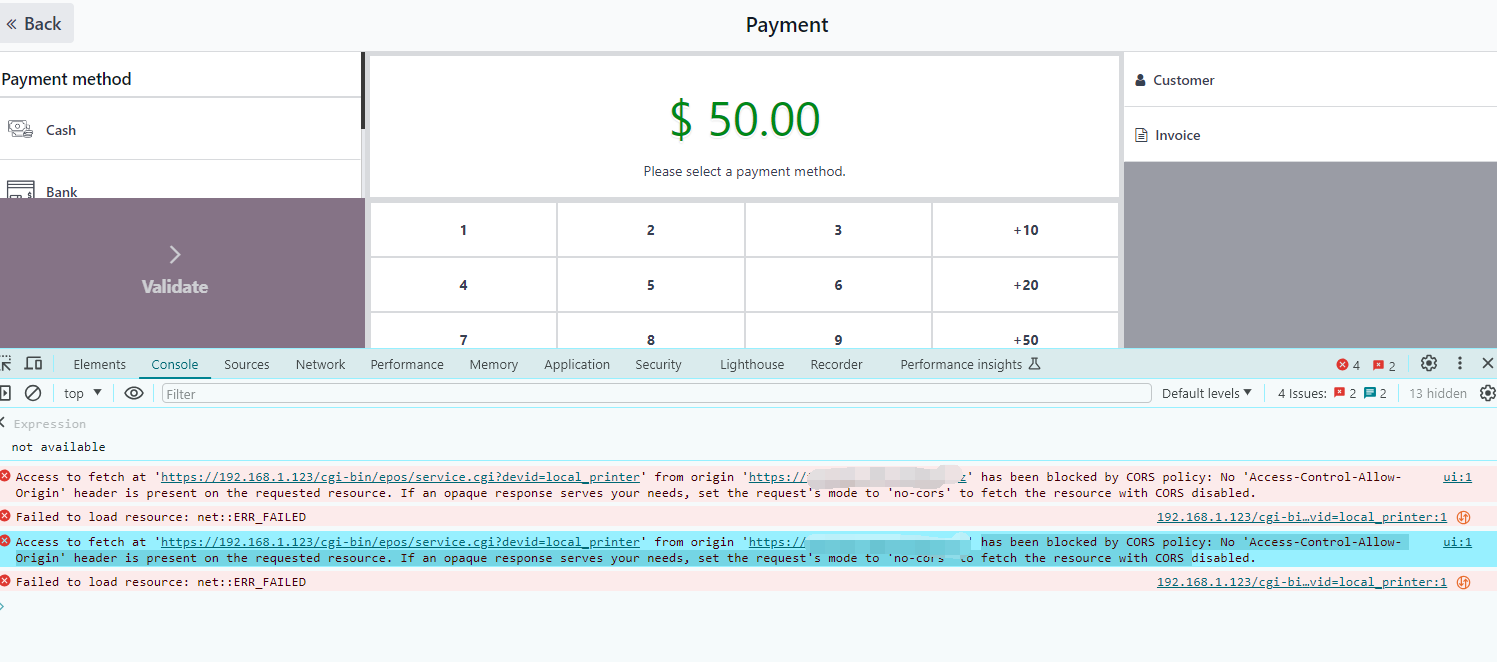
Different browsers handle this differently. Using Microsoft Edge as an example, one workaround is to copy the desktop Edge shortcut and add the following startup parameters in its properties:
--disable-web-security --user-data-dir=C:\edgeDevData
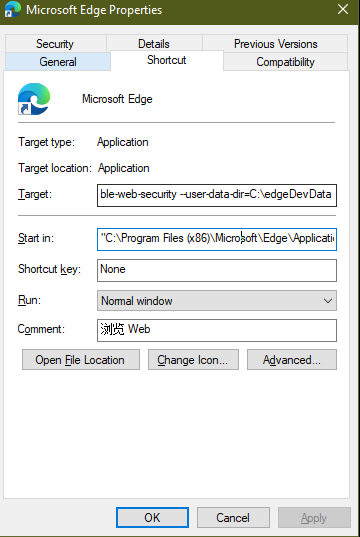
Use this approach carefully and only for the POS workstation that needs printer access. Do not use a browser with disabled web security for normal internet browsing.
6. Enable ePOS-Print On The Printer
By default, the ePOS-Print function may not be enabled on the printer. Open the printer's ePOS settings page and enable ePOS-Print.
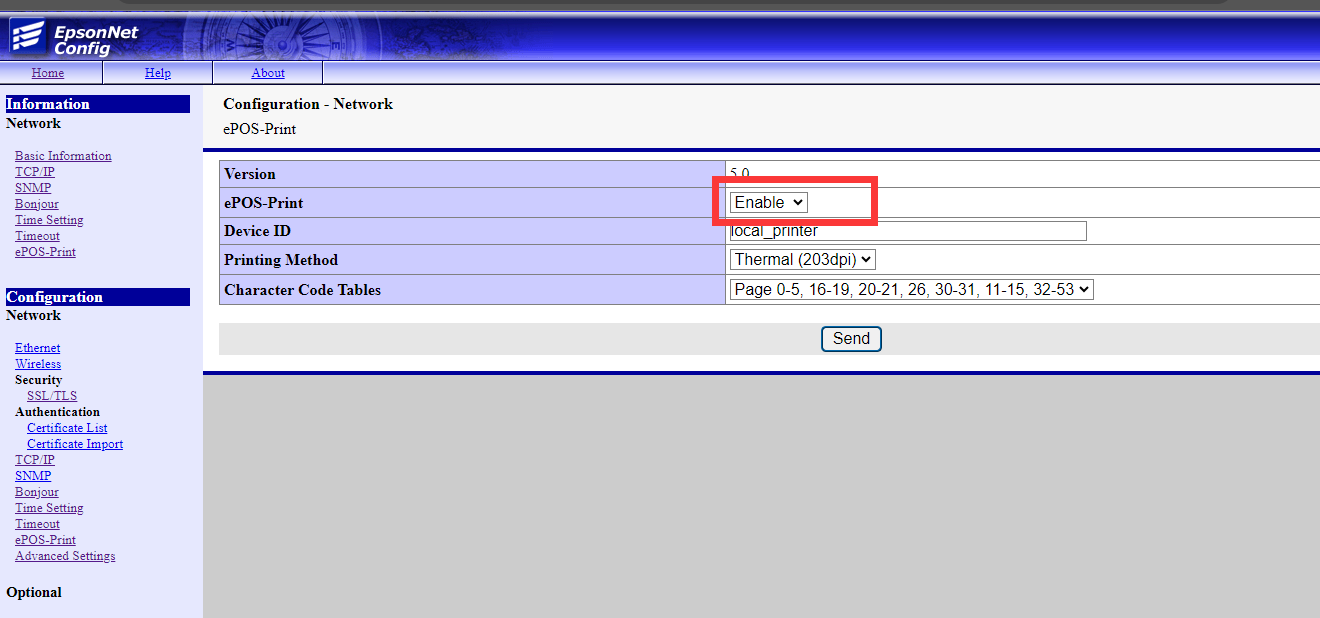
If all steps are completed correctly, the POS print button should be able to print receipts through the thermal printer.
This chapter covered the practical ePOS printing setup. The next chapter explains a POS sales display enhancement for stores that need to control how many products are shown in the POS product area.