Chapter 3 POS Receipts And Invoices
This article is based on Odoo 18 and Qingdao Ohm's POS solution module
mommy_pos.
Receipts are the customer's proof of purchase in a POS transaction. For registered customers, POS can also create invoices. This chapter explains receipt headers and footers, automatic printing, receipt reprinting, receipt preview, receipt language settings, and POS invoicing.
Receipts
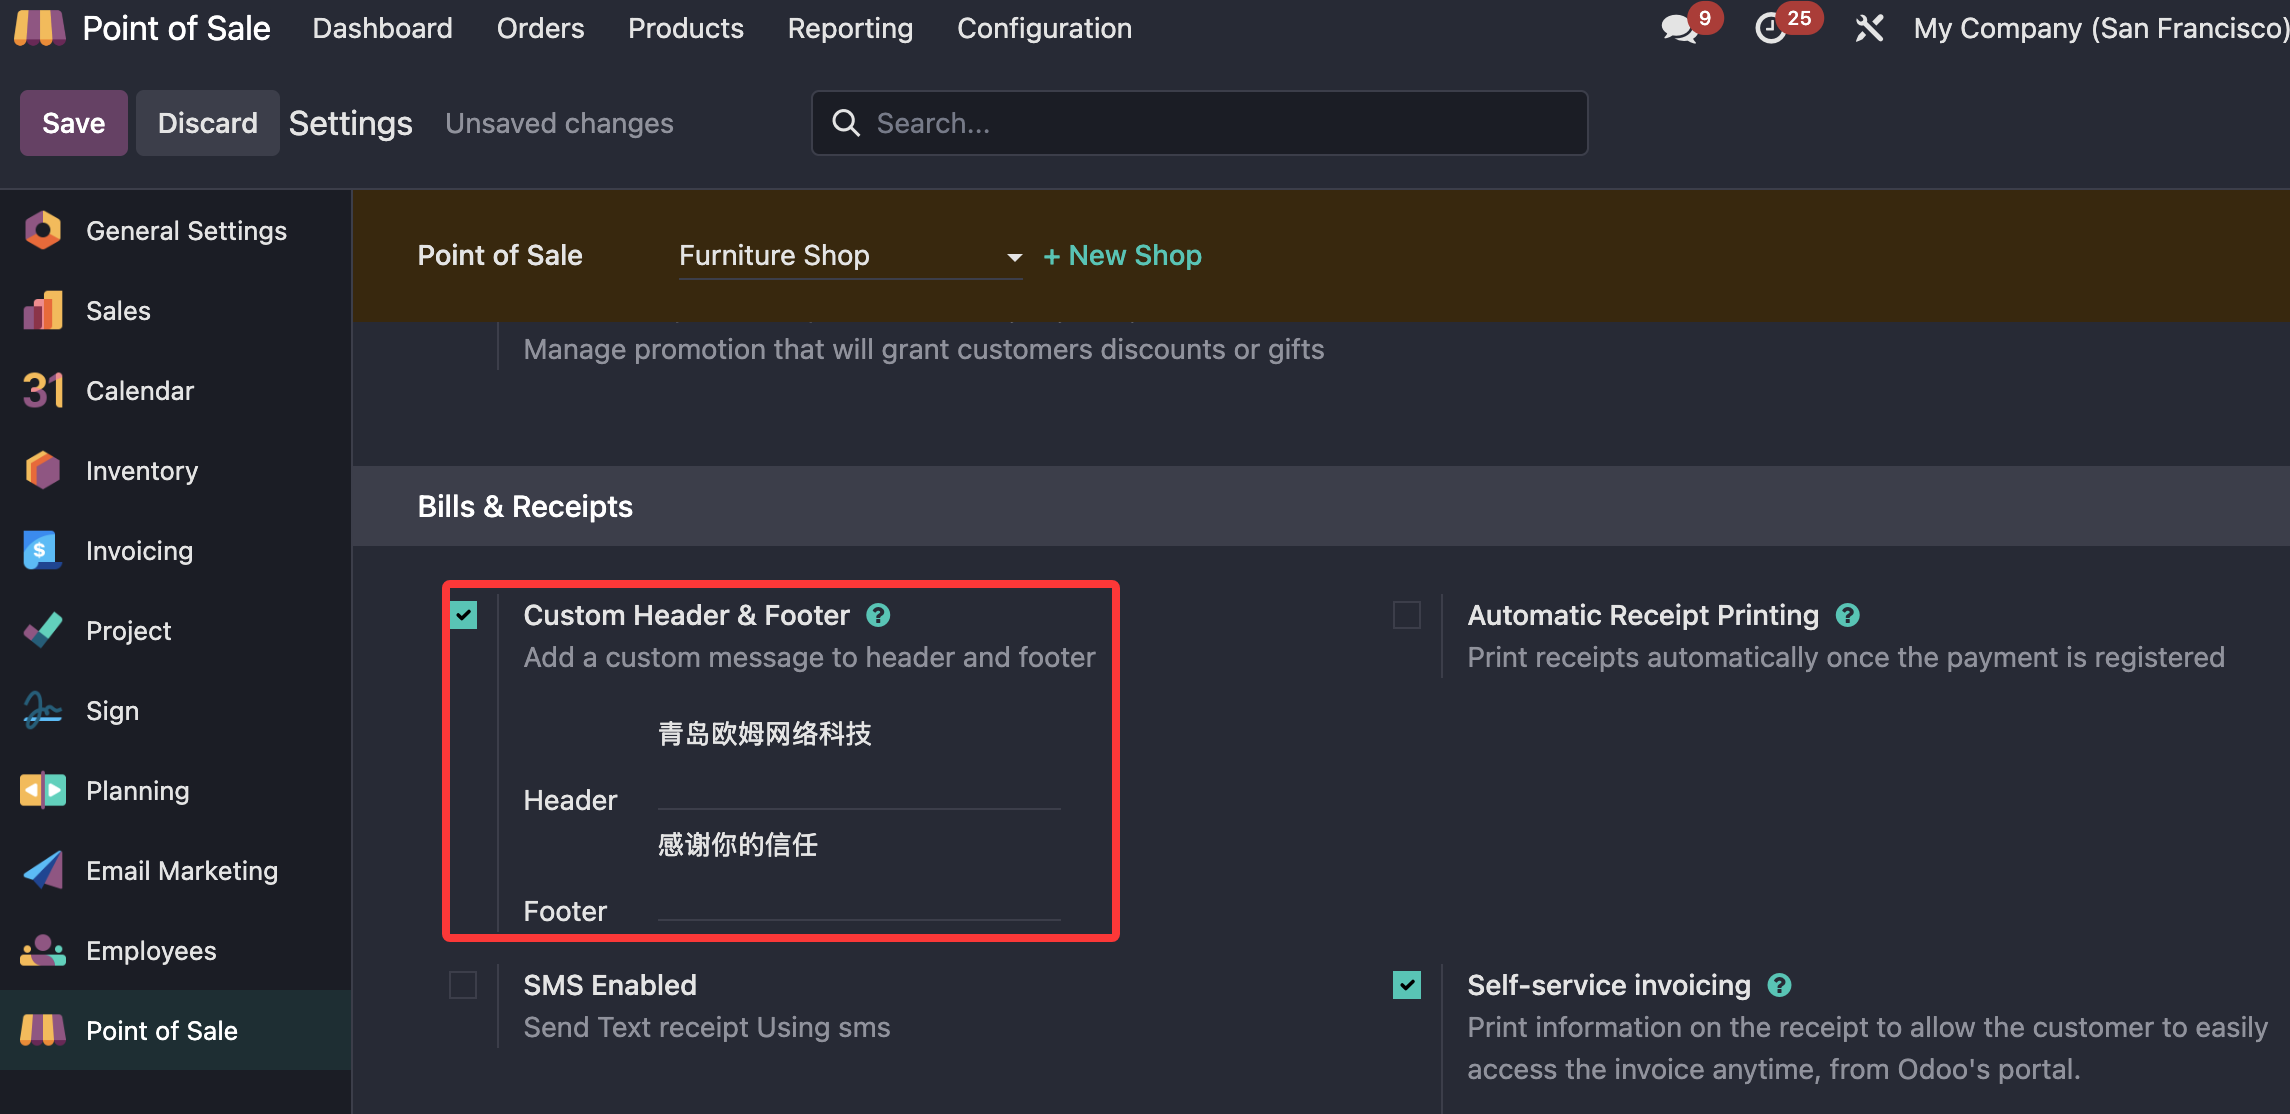
To configure POS receipts in Odoo, go to Point of Sale > Settings > Point of Sale, select a POS store, and scroll to the Bills & Receipts section.
Custom Receipt Header And Footer
To customize the receipt header and footer, enable the custom header and footer option, then enter the text you want to display.
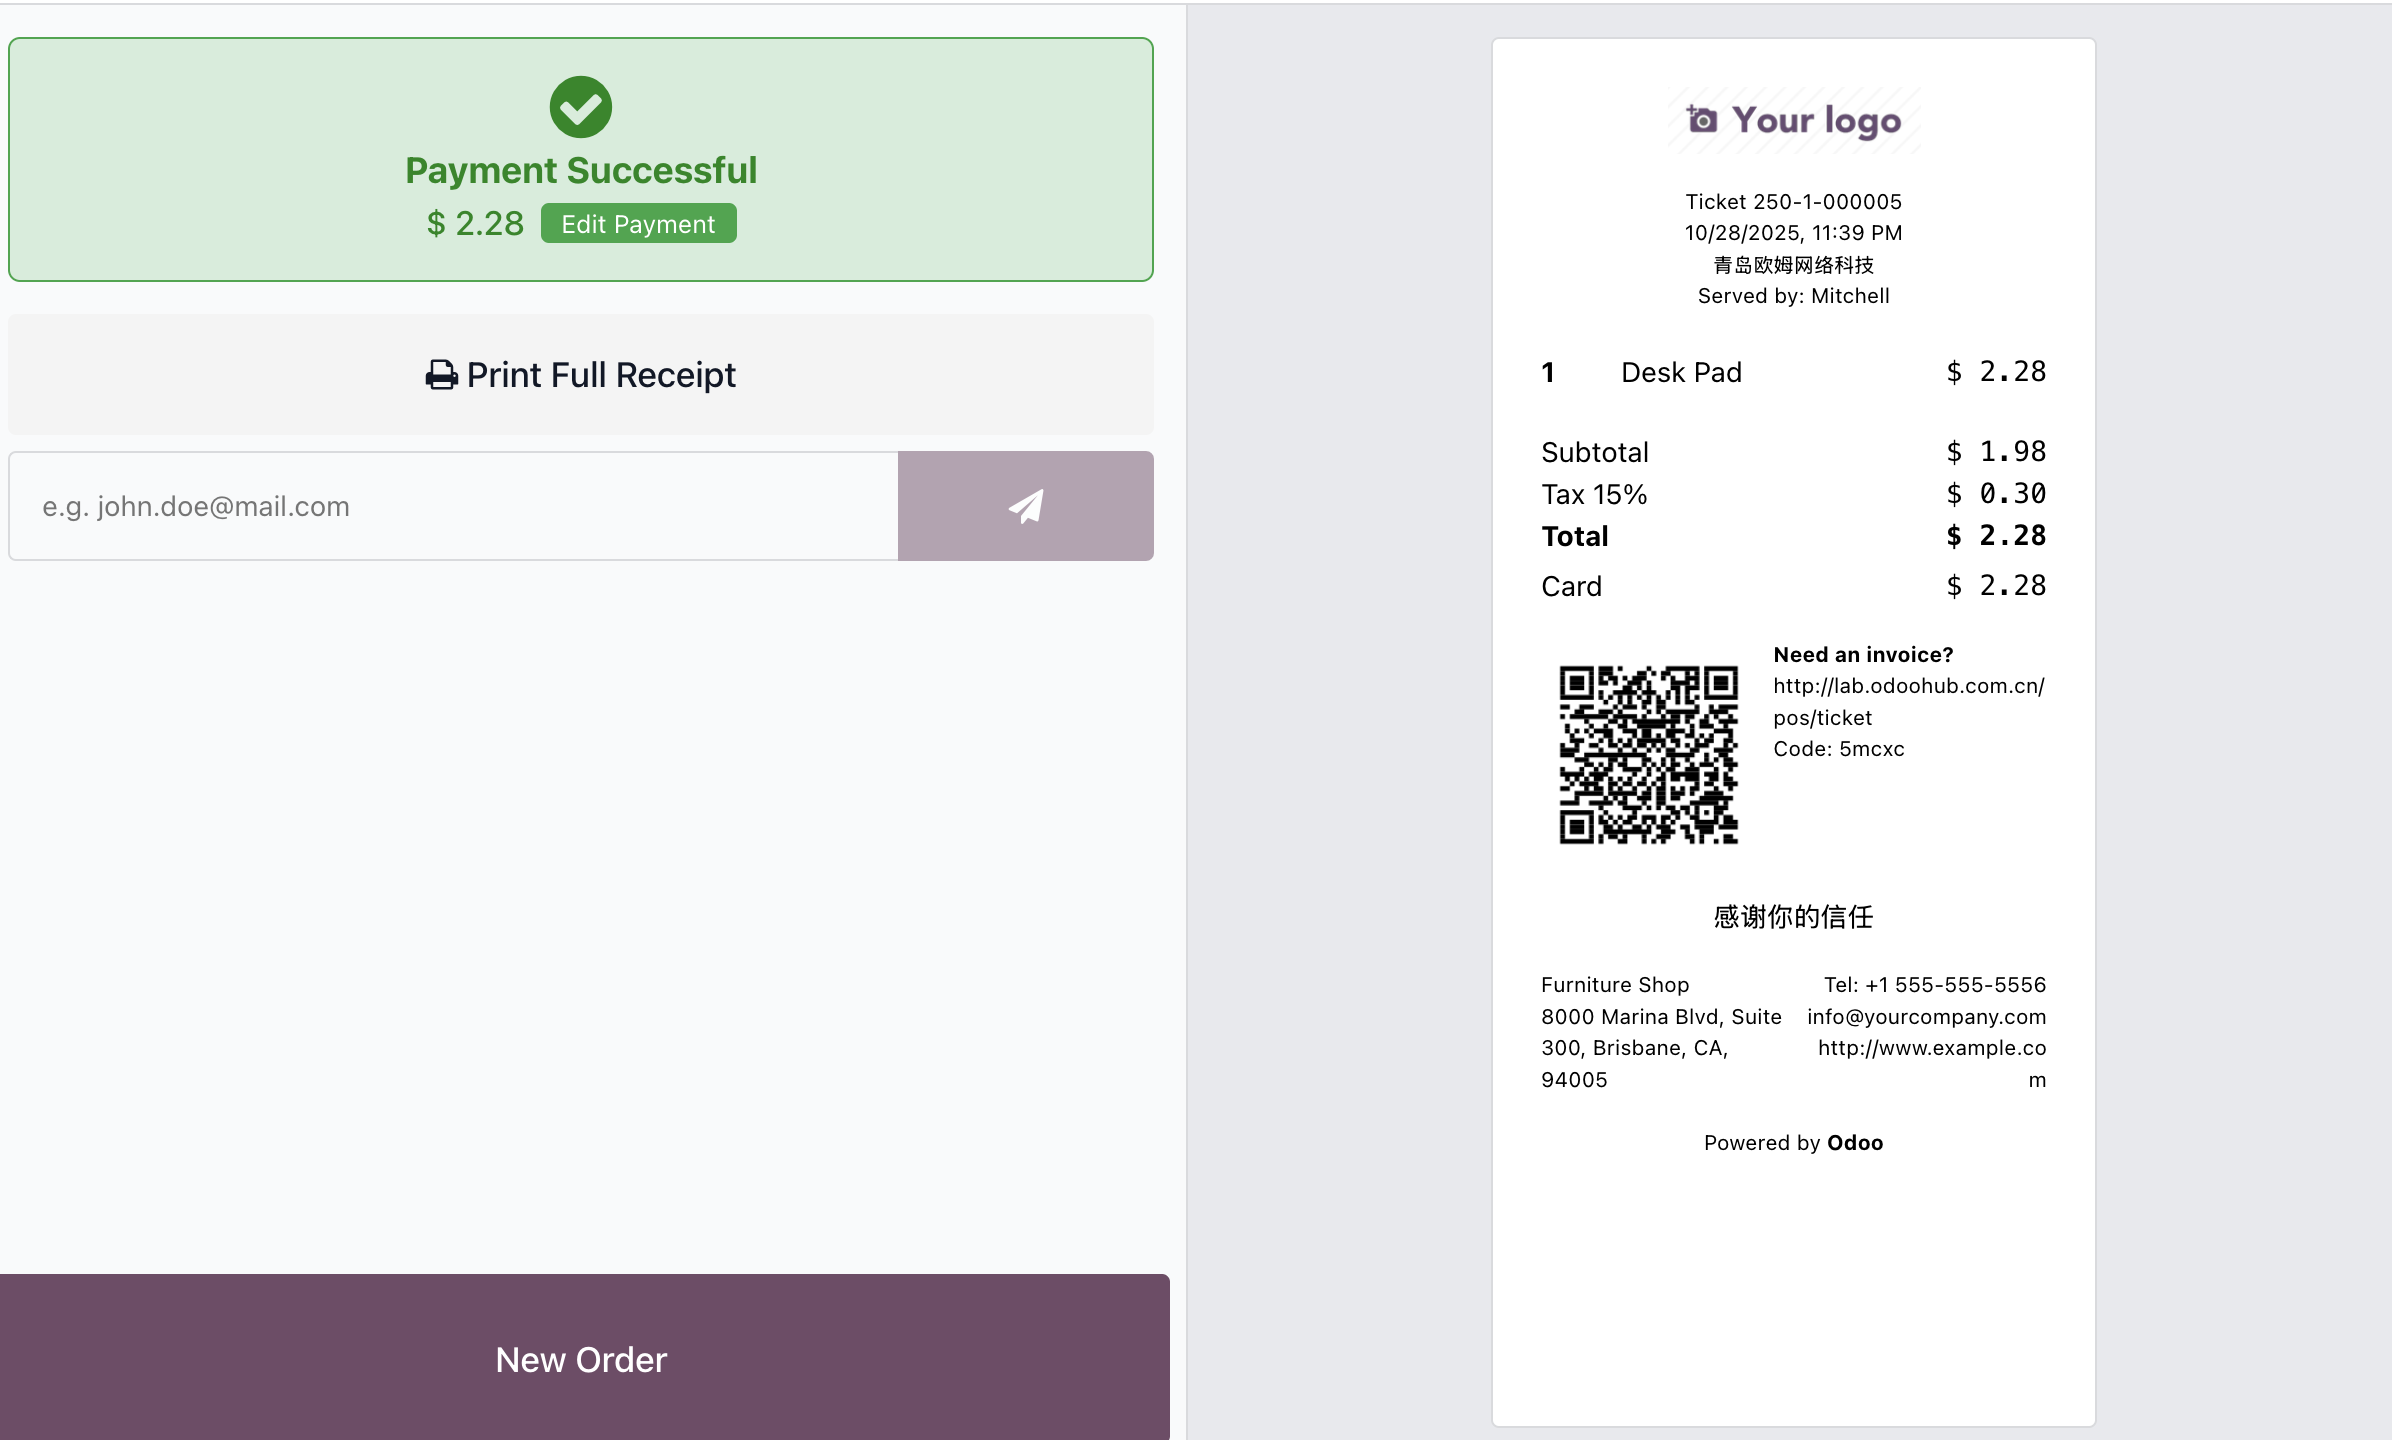
After saving, return to the POS frontend. When the receipt is printed, the custom header and footer are shown.
Automatic Printing
Odoo supports automatic receipt printing during payment. Enable Automatic Receipt Printing in the POS settings.
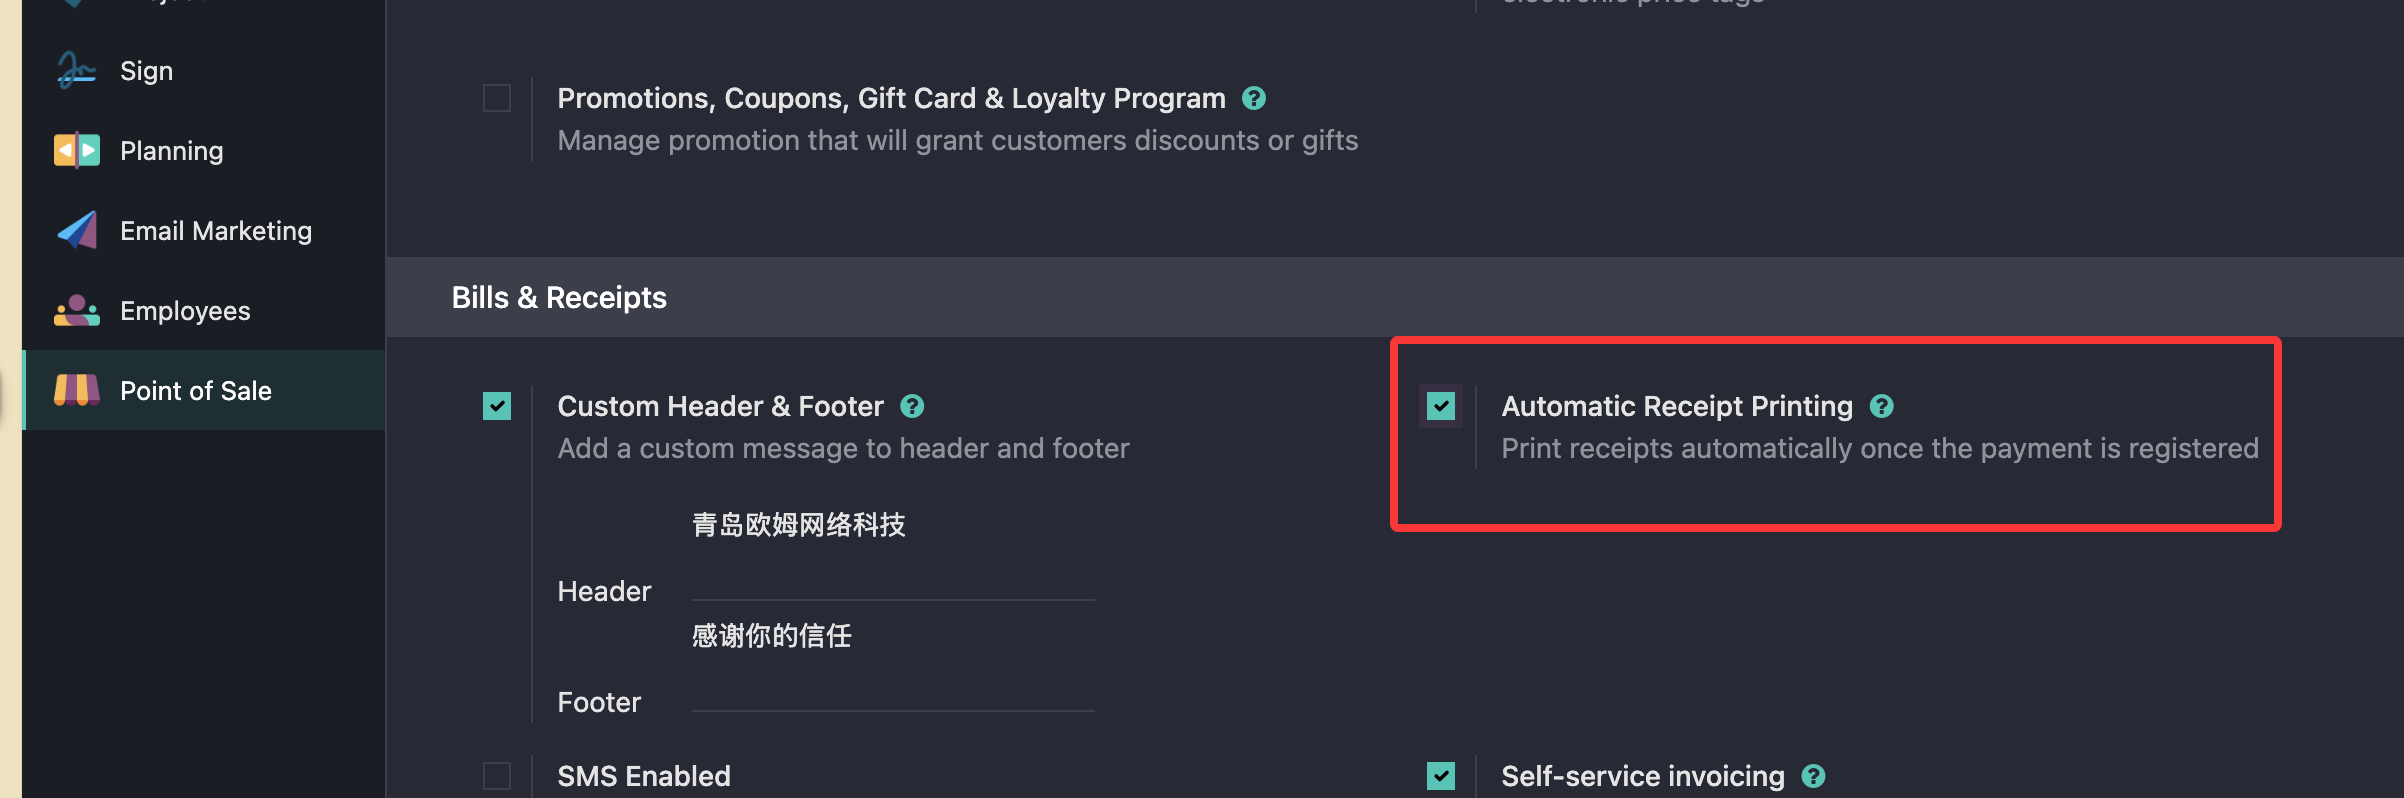
This may require ePOS support, depending on the printer and deployment method.
Reprint Receipts
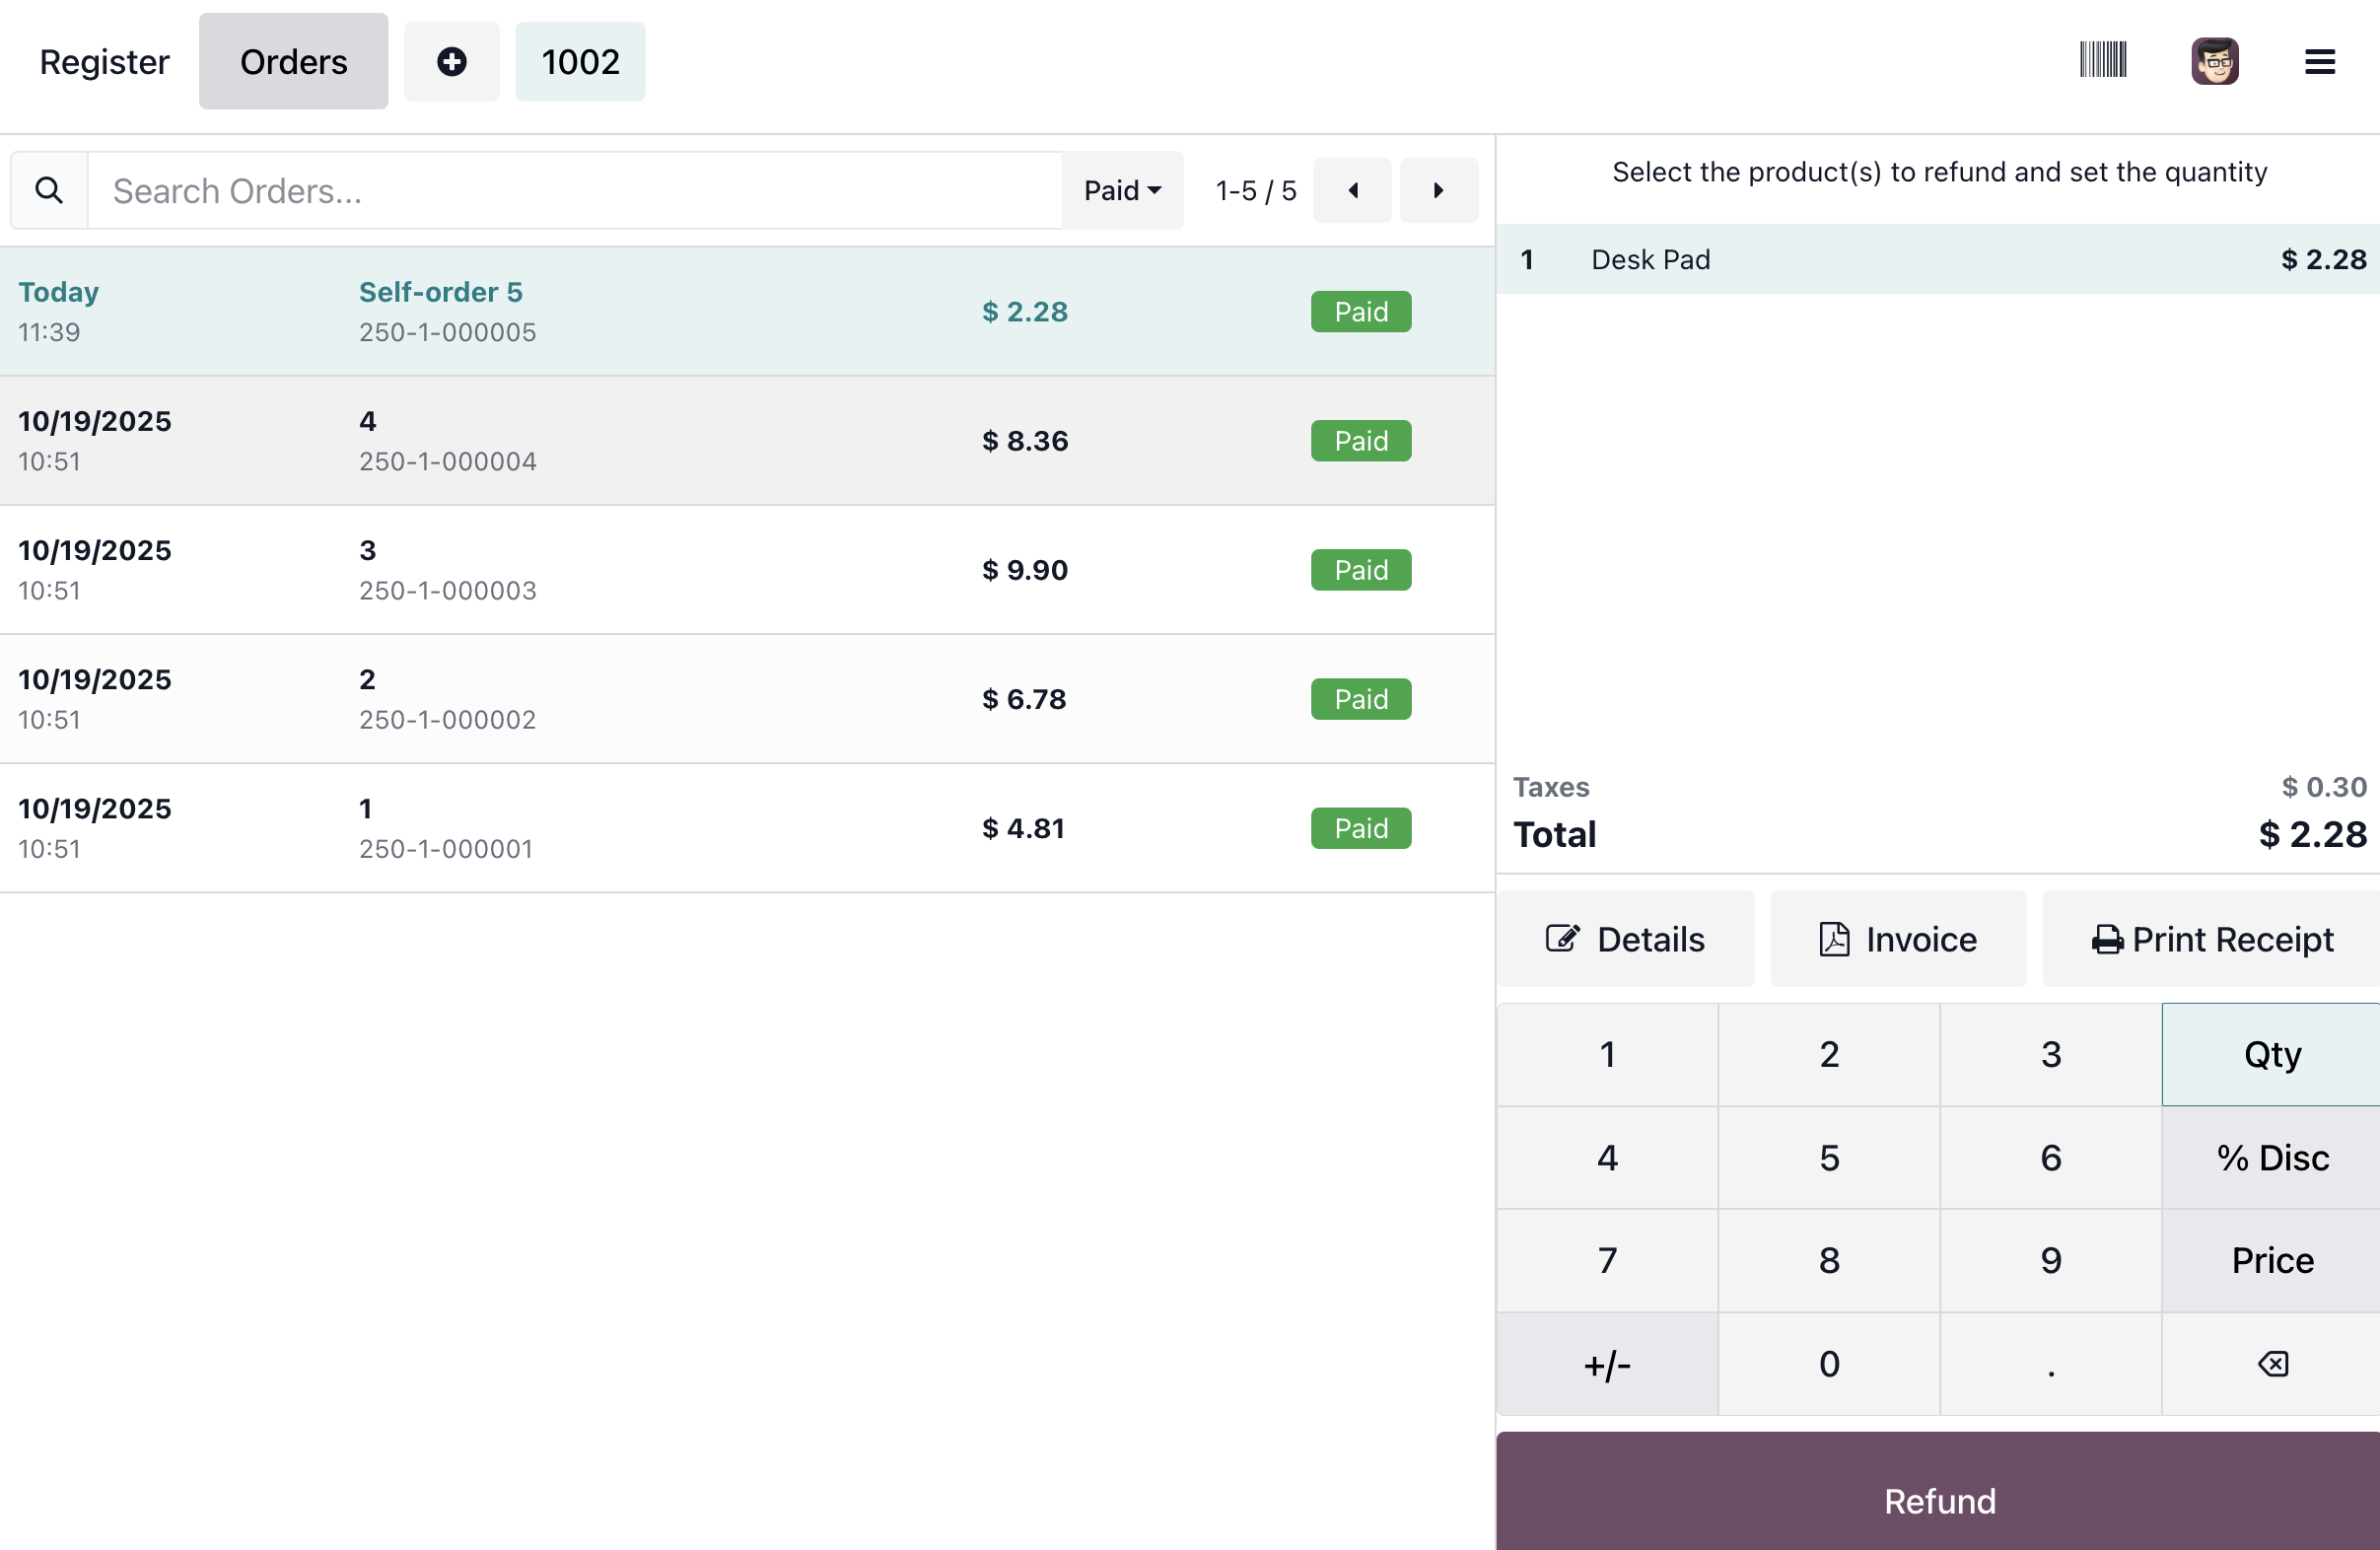
Normally, receipts are printed when payment is completed. If the customer loses the receipt and needs another copy, load the paid order first, then click Print Receipt.
Receipt Preview
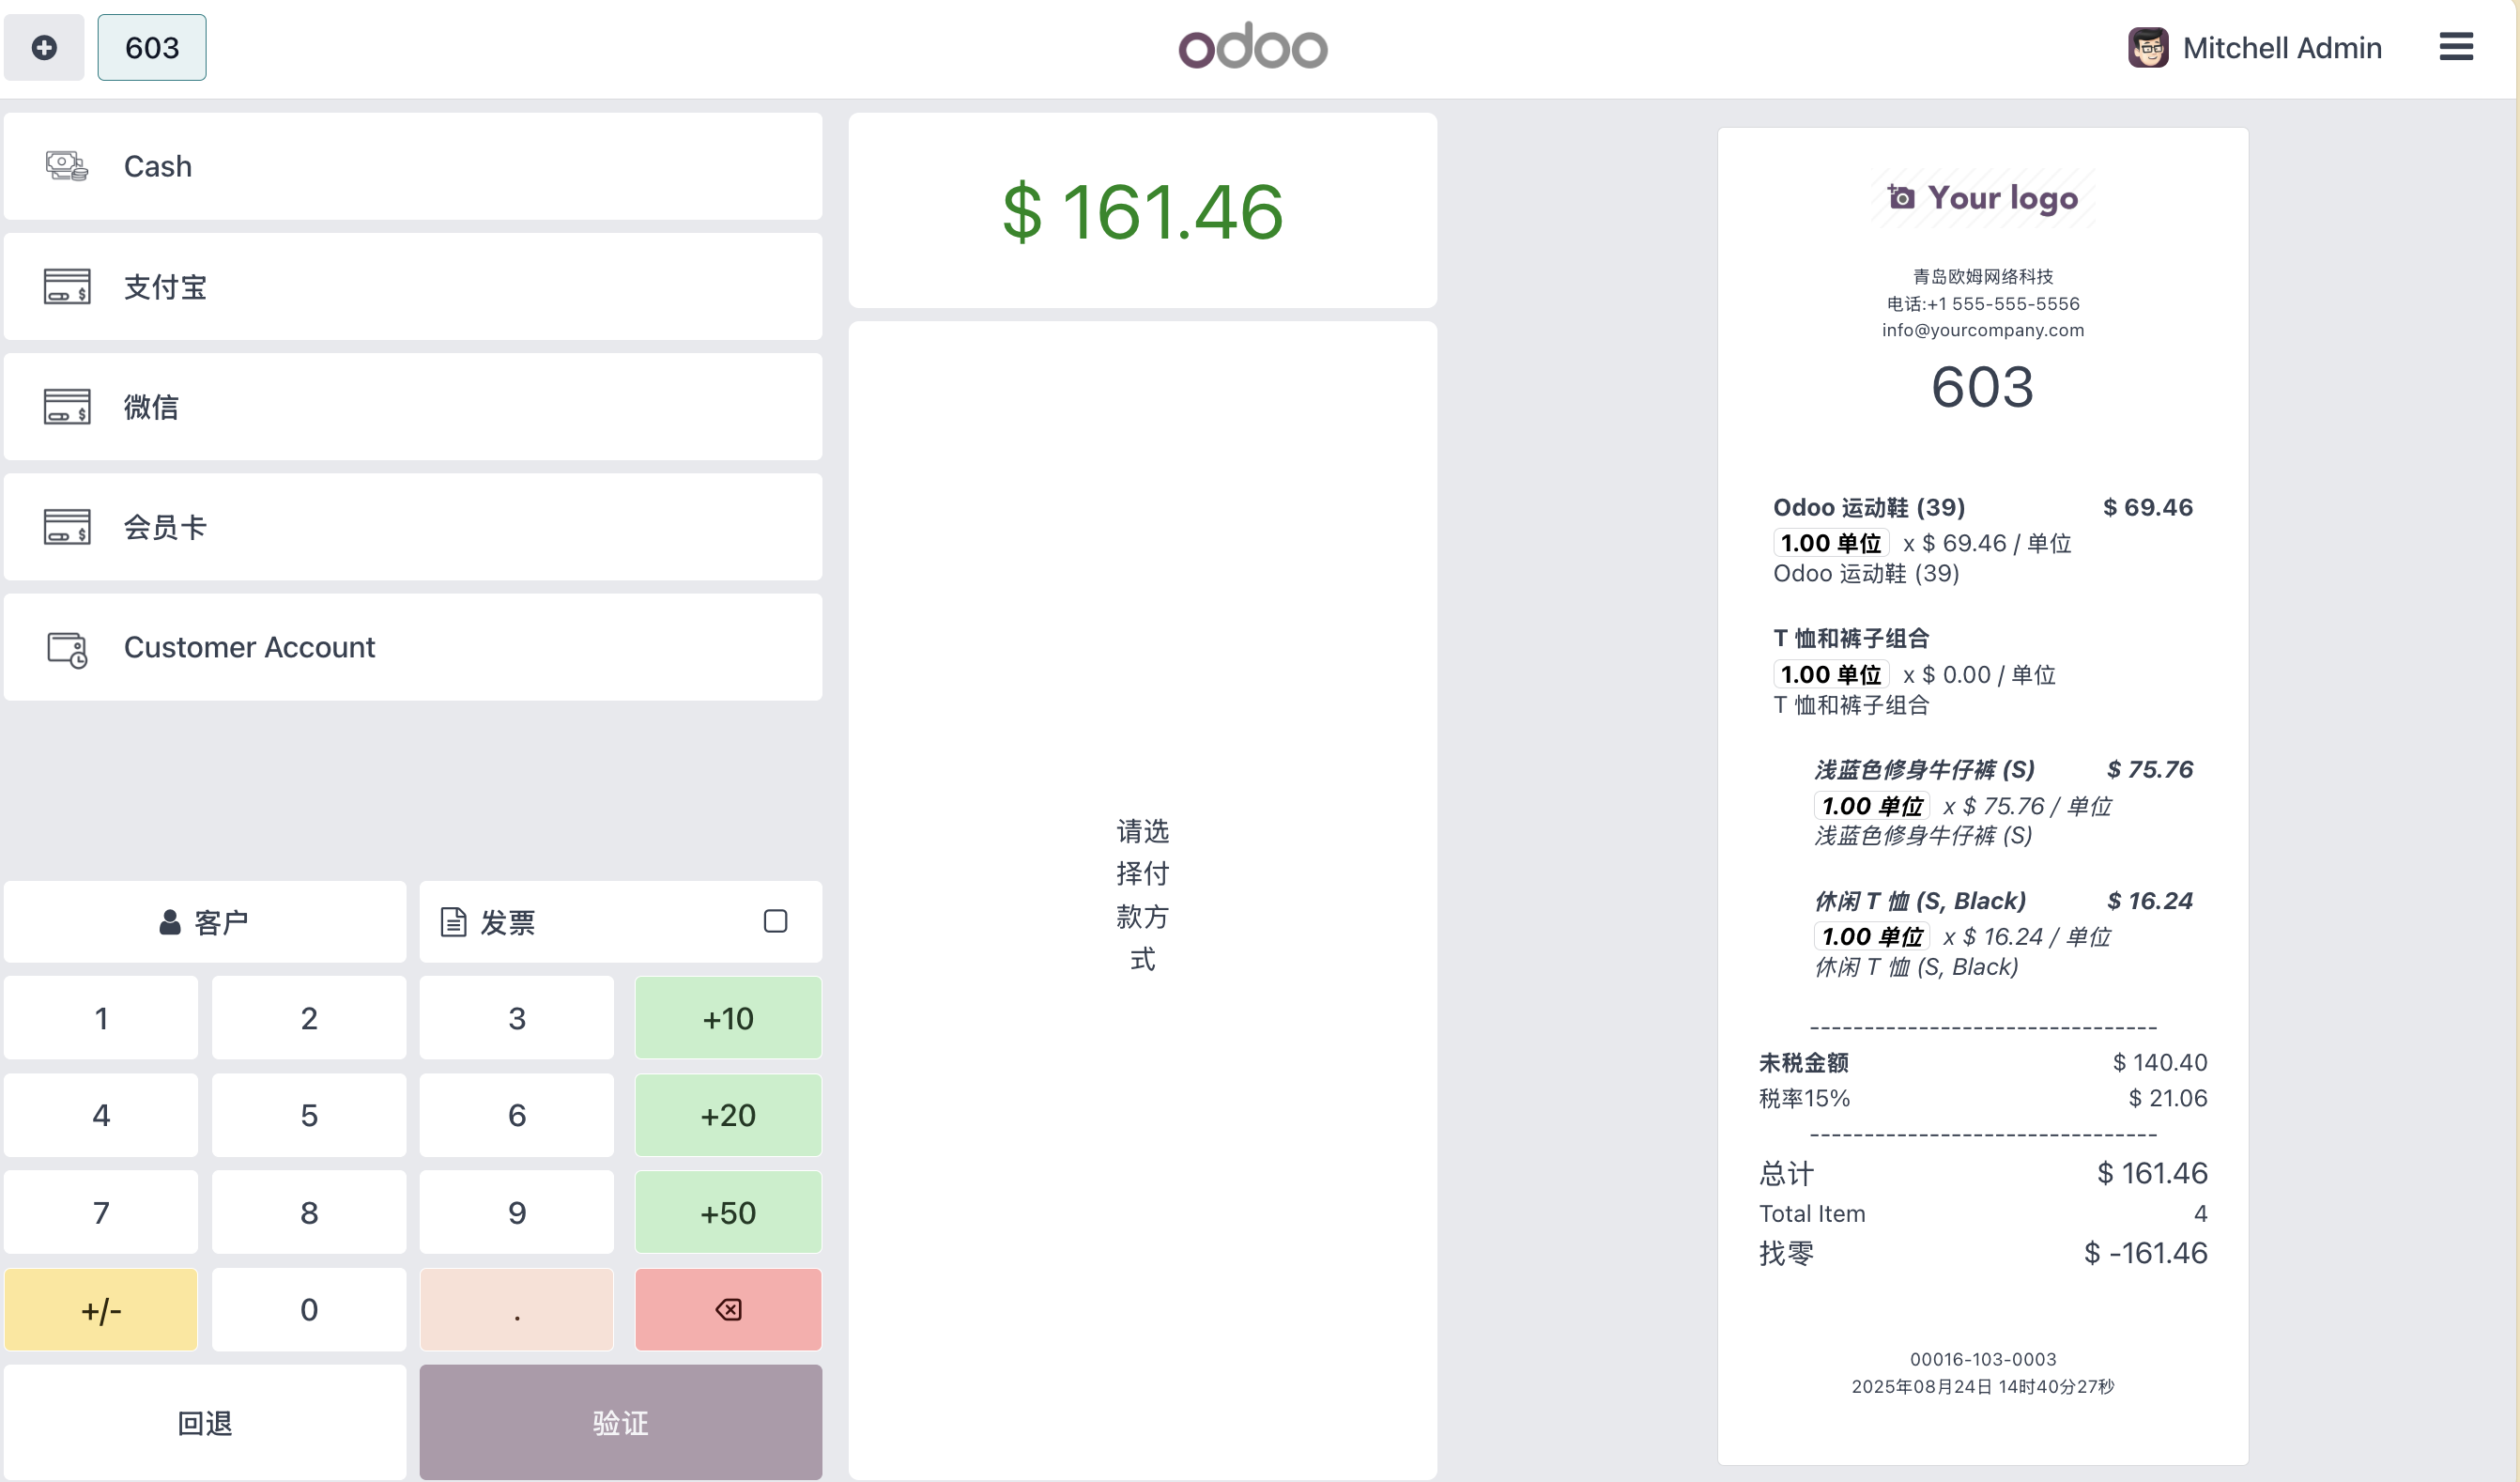
In native Odoo, the receipt is usually shown after payment is completed. In some projects, users want to preview the receipt before payment, especially when checking discounts, taxes, customer information, or custom receipt text.
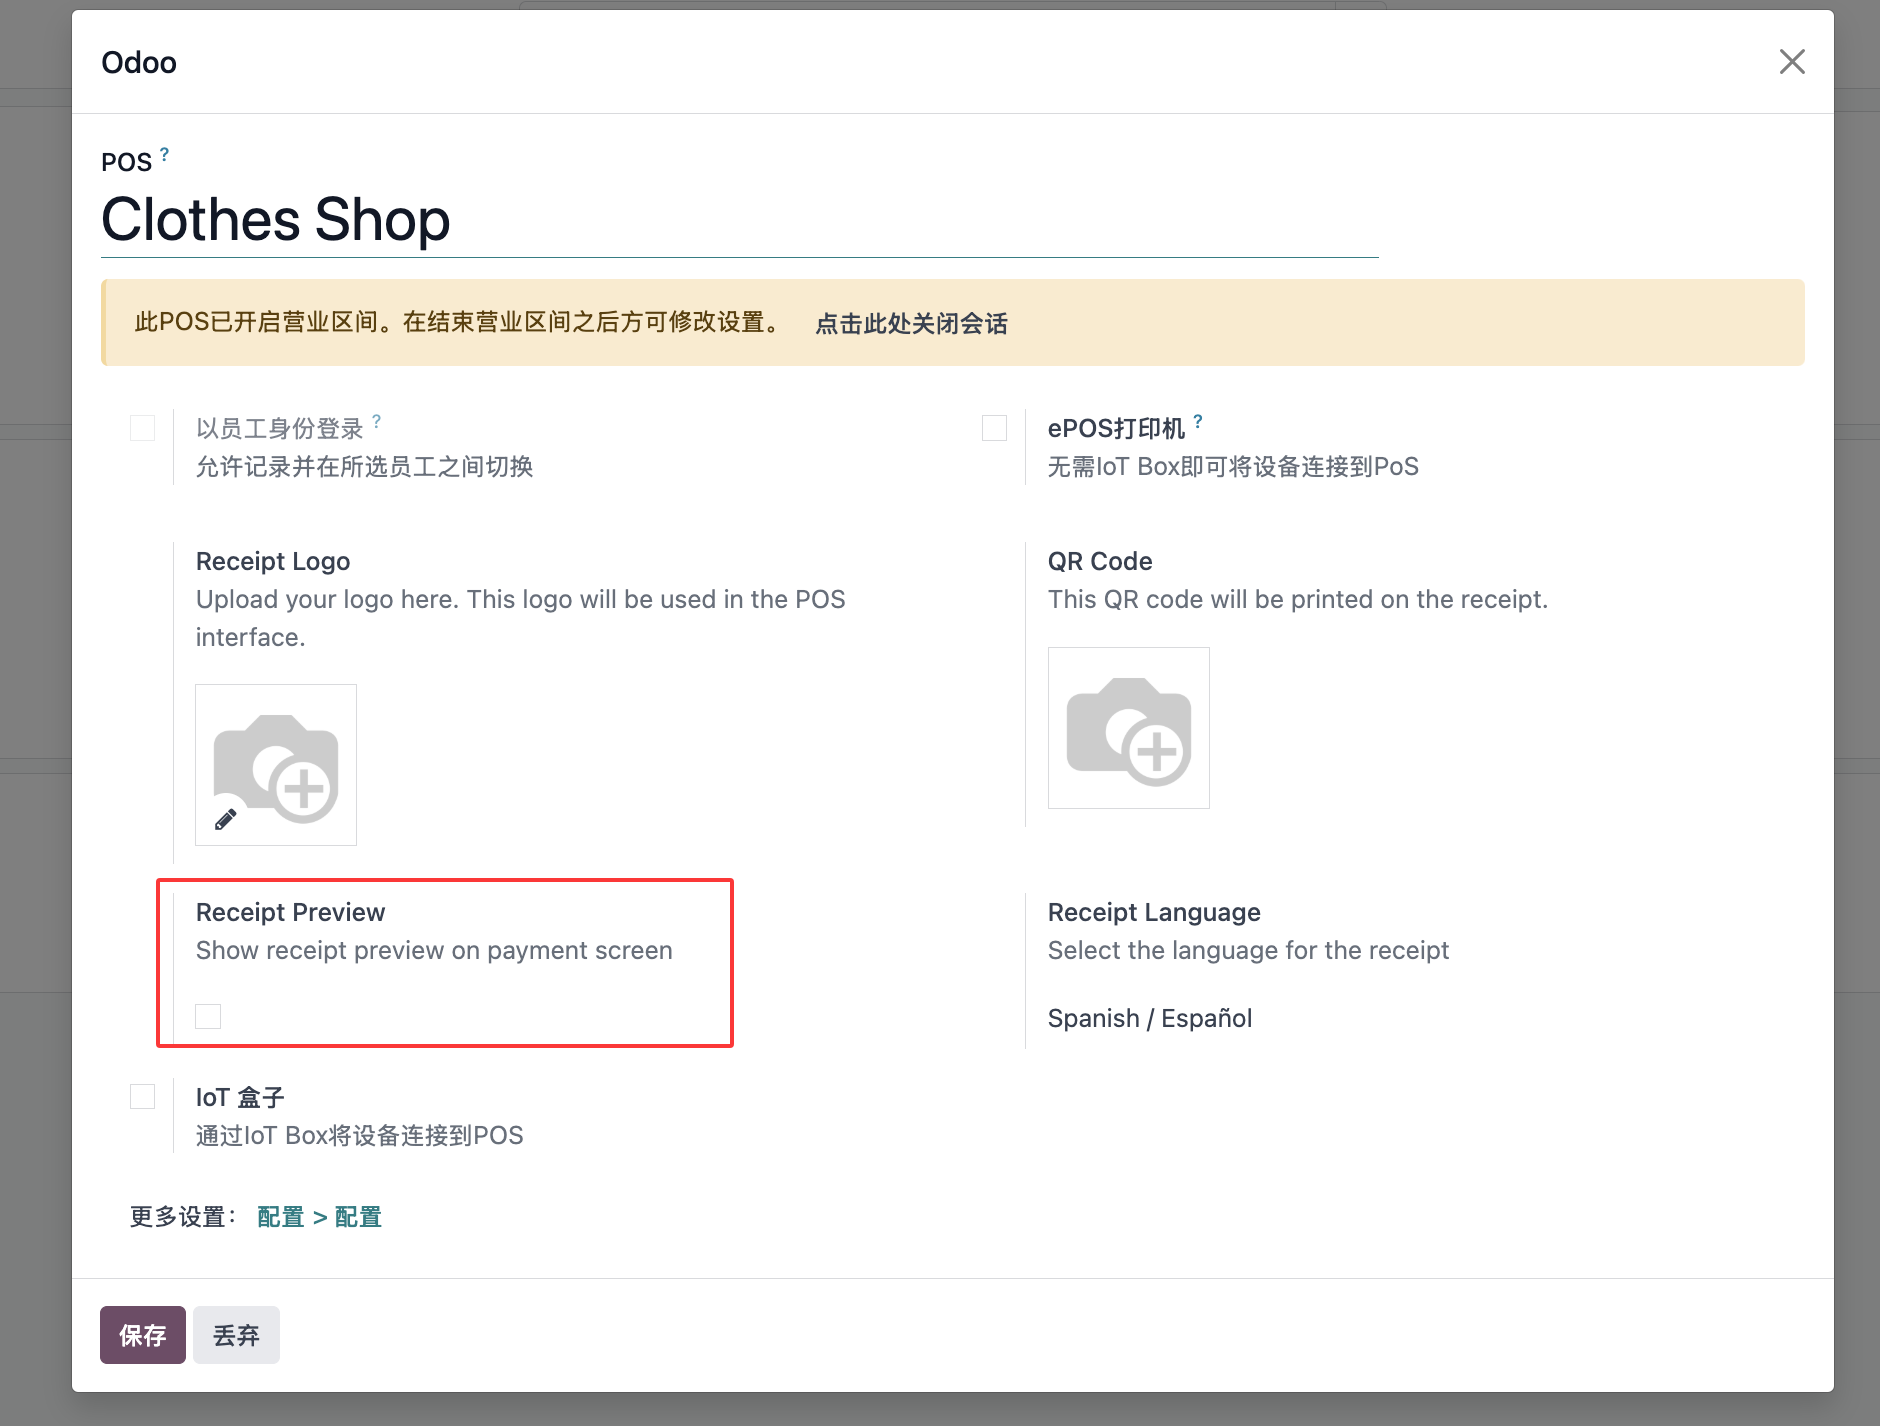
Our POS general solution adds a receipt preview option. First, enable receipt preview in the POS store settings.
After this setting is enabled, when users select products and enter the payment screen, the current receipt preview appears on the right side.
Receipt Language
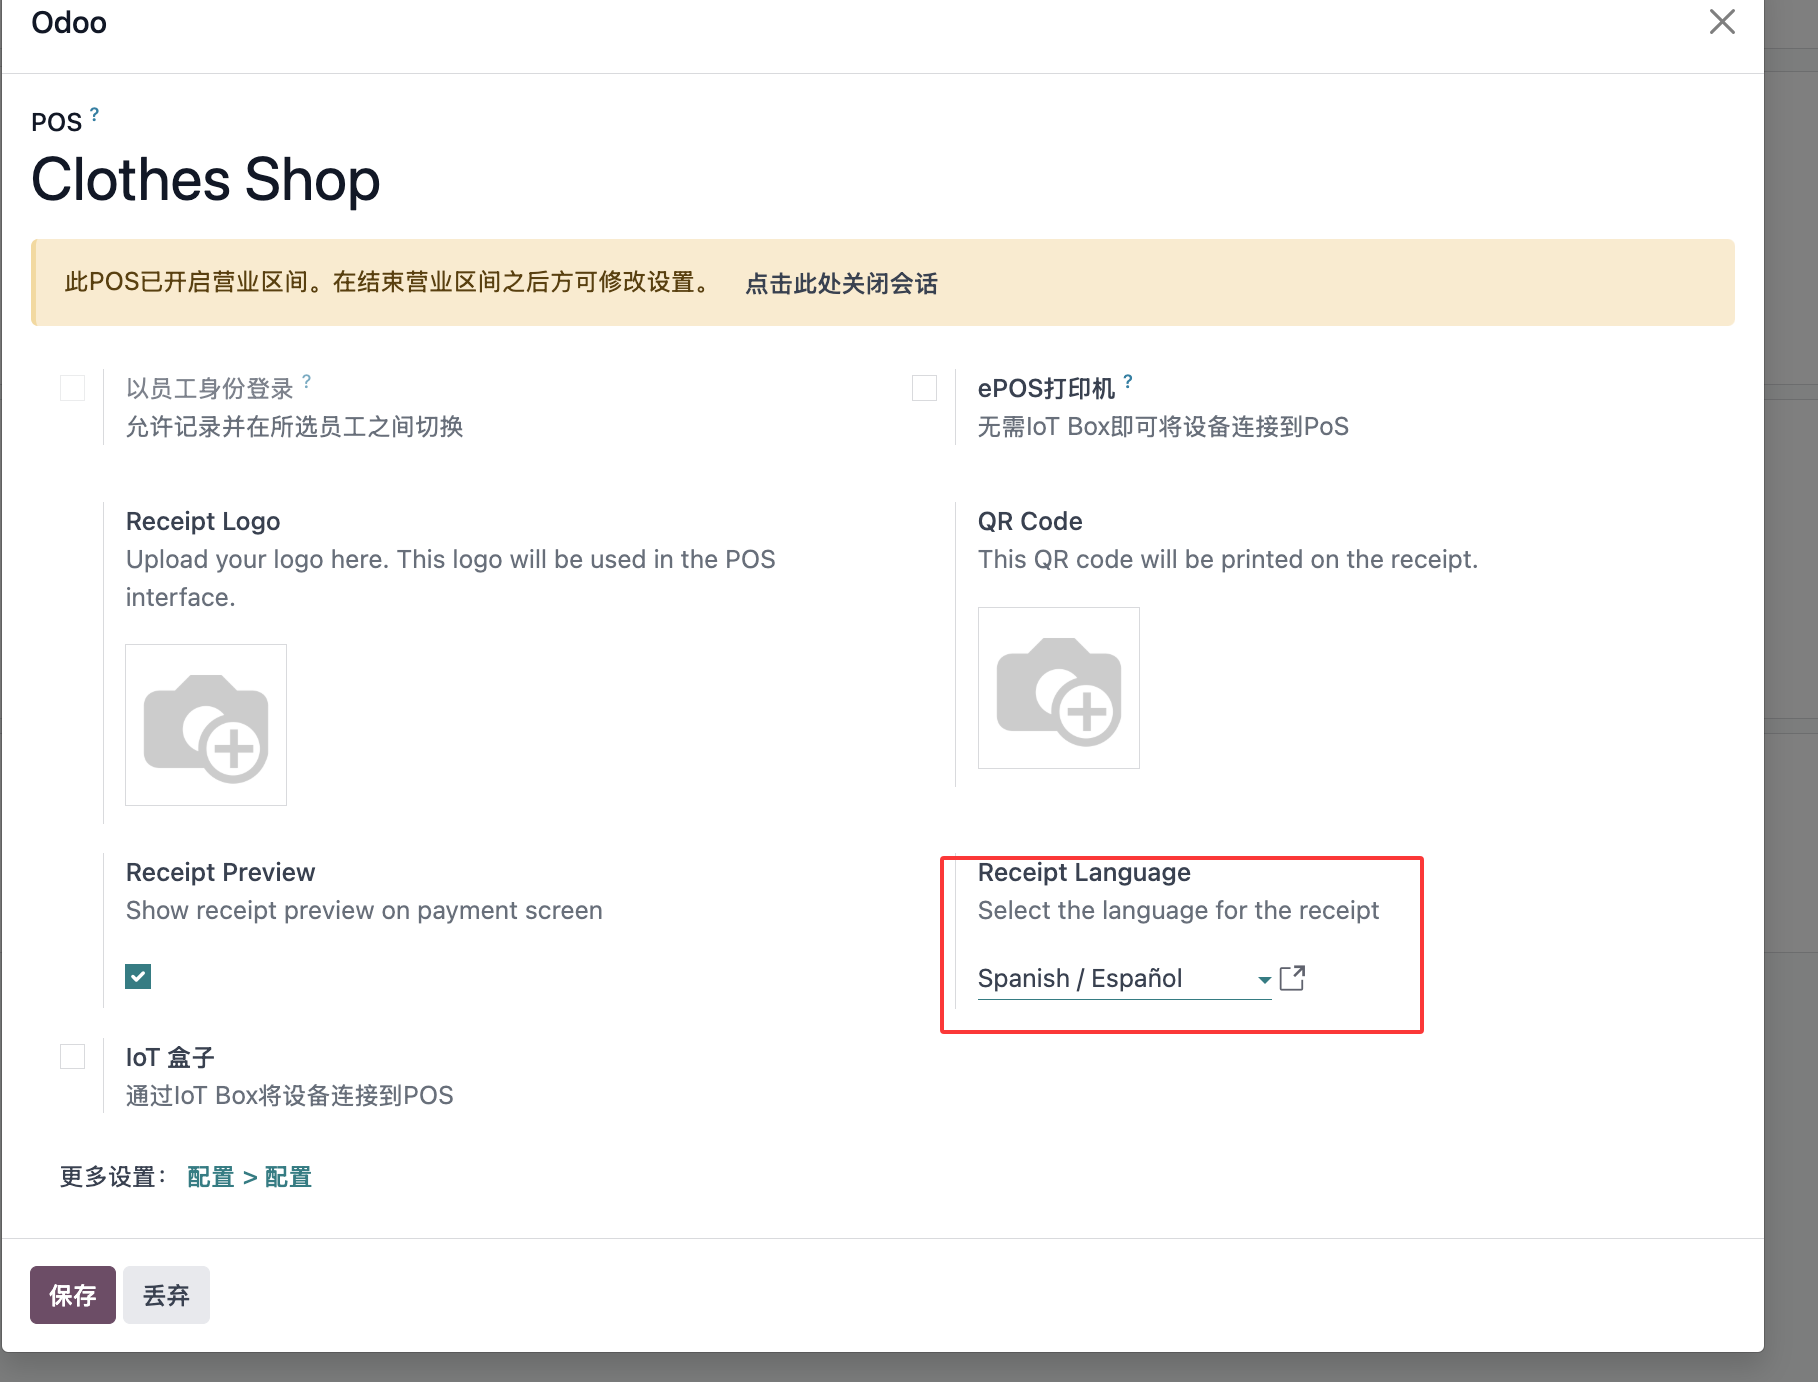
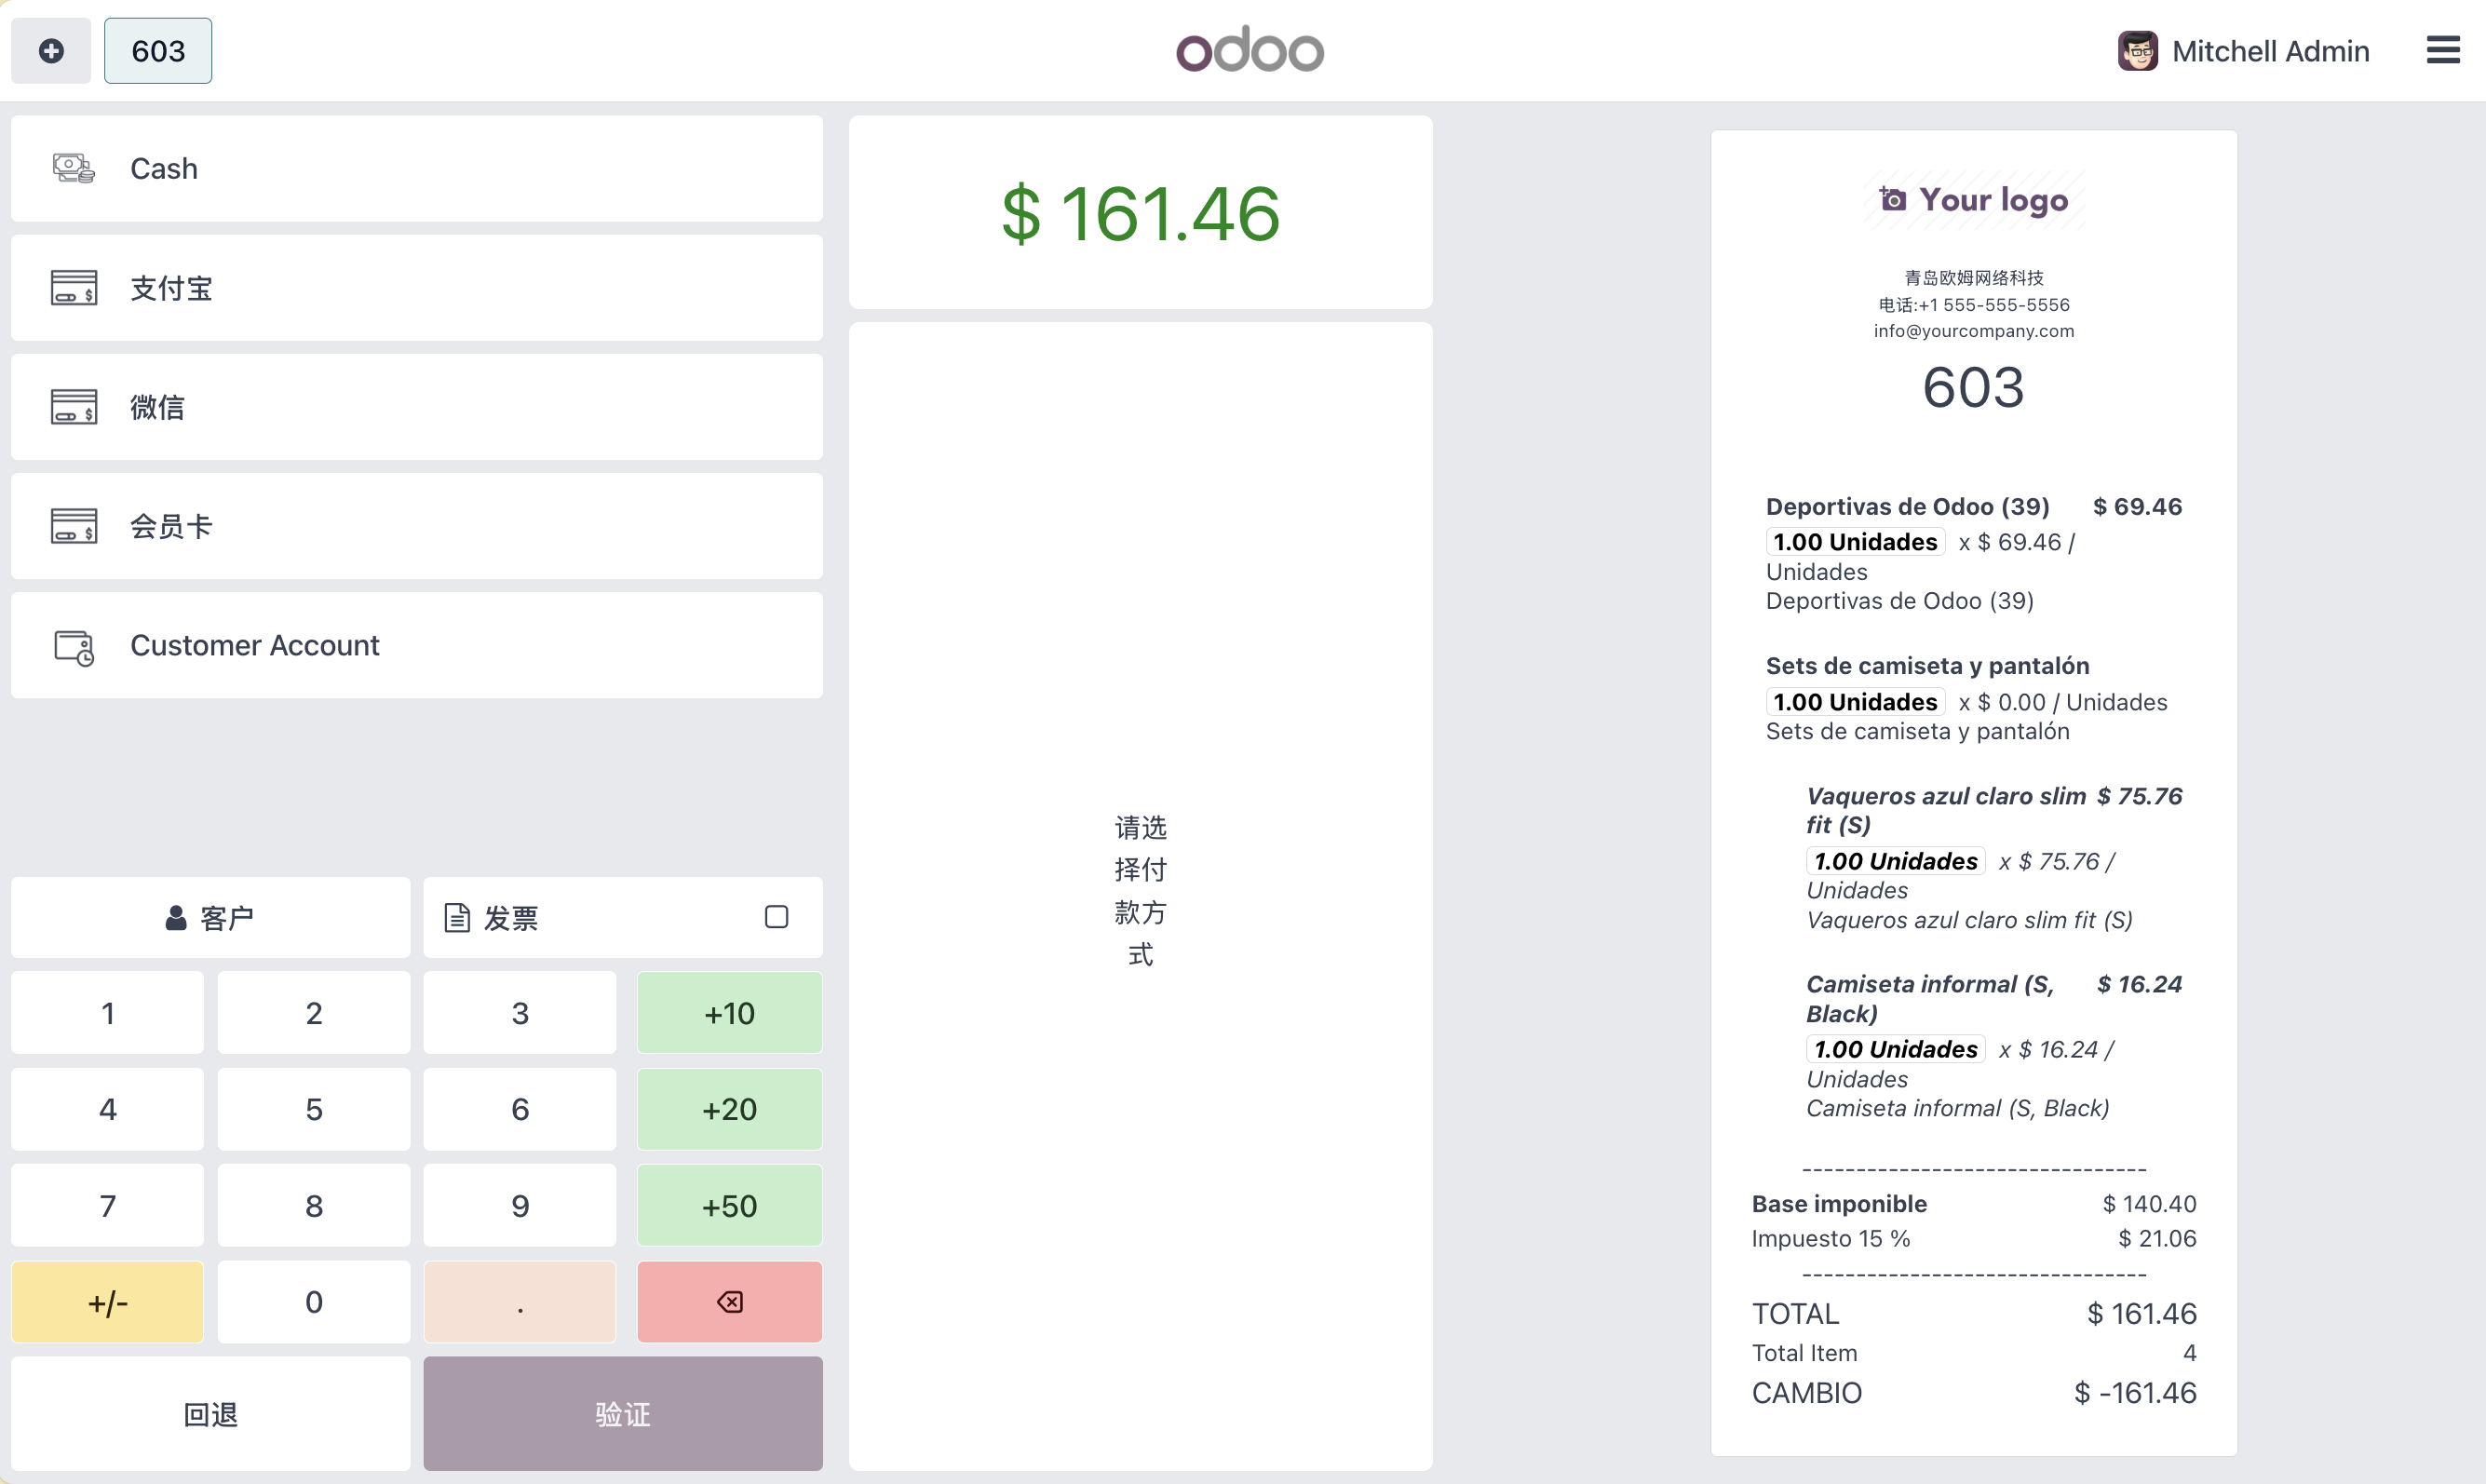
Native Odoo receipts use the language selected by the current user. This works in most cases, but some stores need a different receipt language from the cashier's interface language. For example, the cashier may use Chinese, while the receipt should be printed in Spanish.
Our solution adds support for selecting the receipt language in the POS store settings.
After saving the setting, return to the POS frontend and preview the receipt.
Invoices
For registered customers, Odoo supports invoicing from the POS.
Configuration
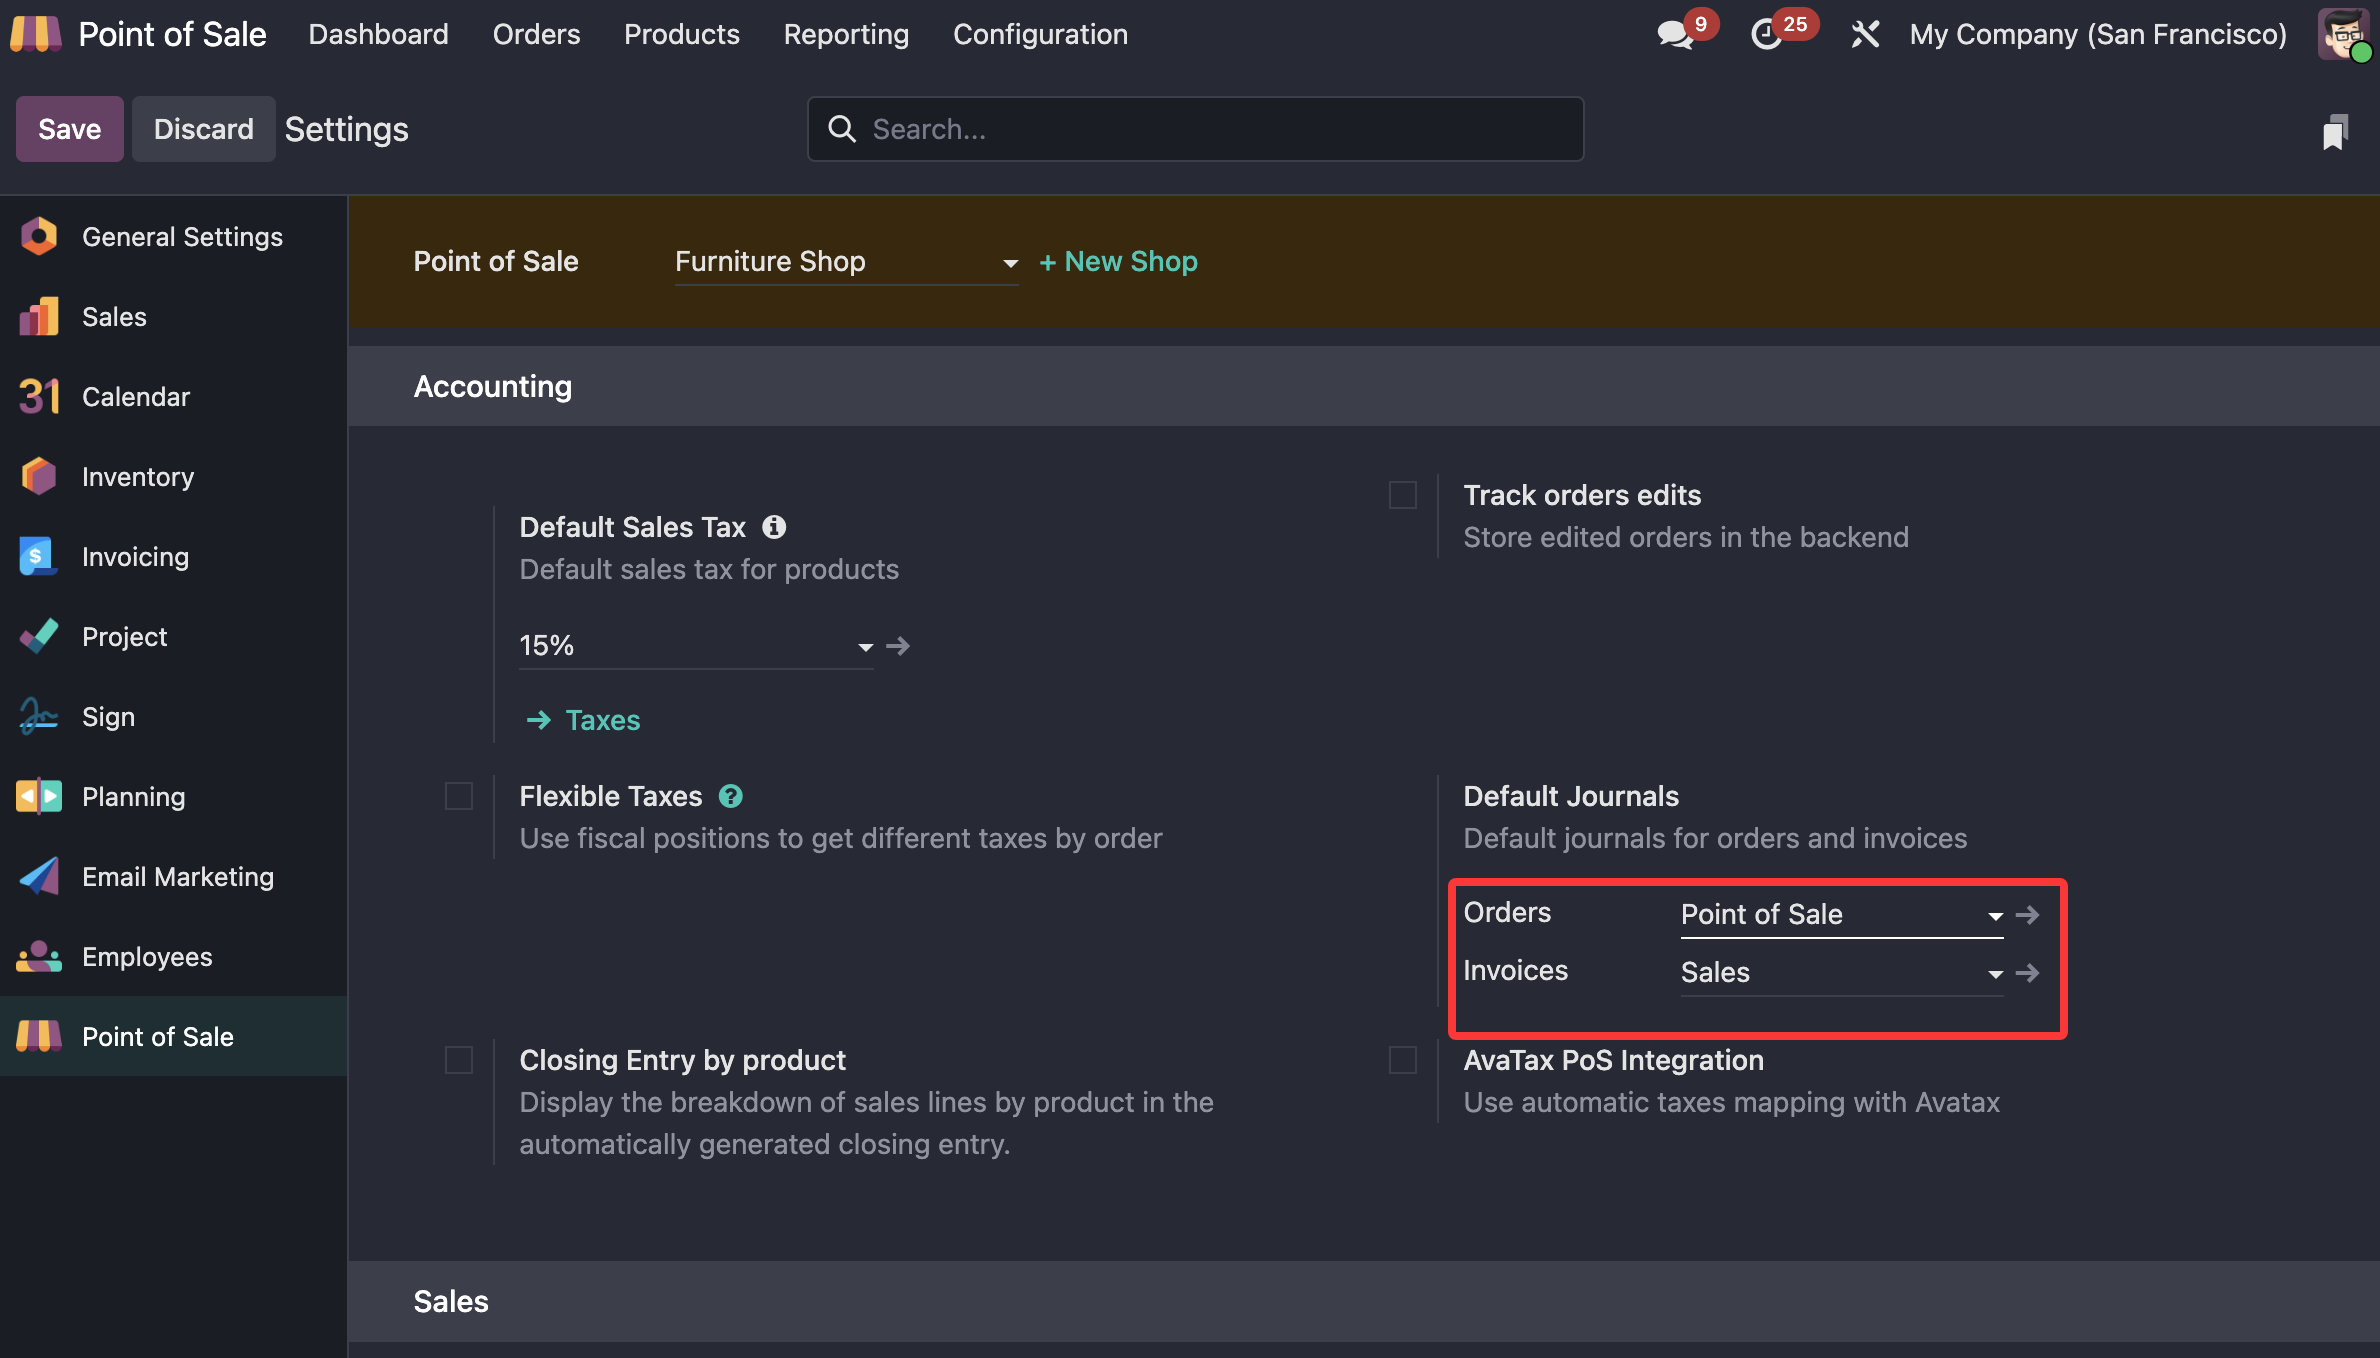
First, define the default journal for POS invoices. In POS settings, scroll to the accounting section and set the default journal.
Invoice A Customer From POS
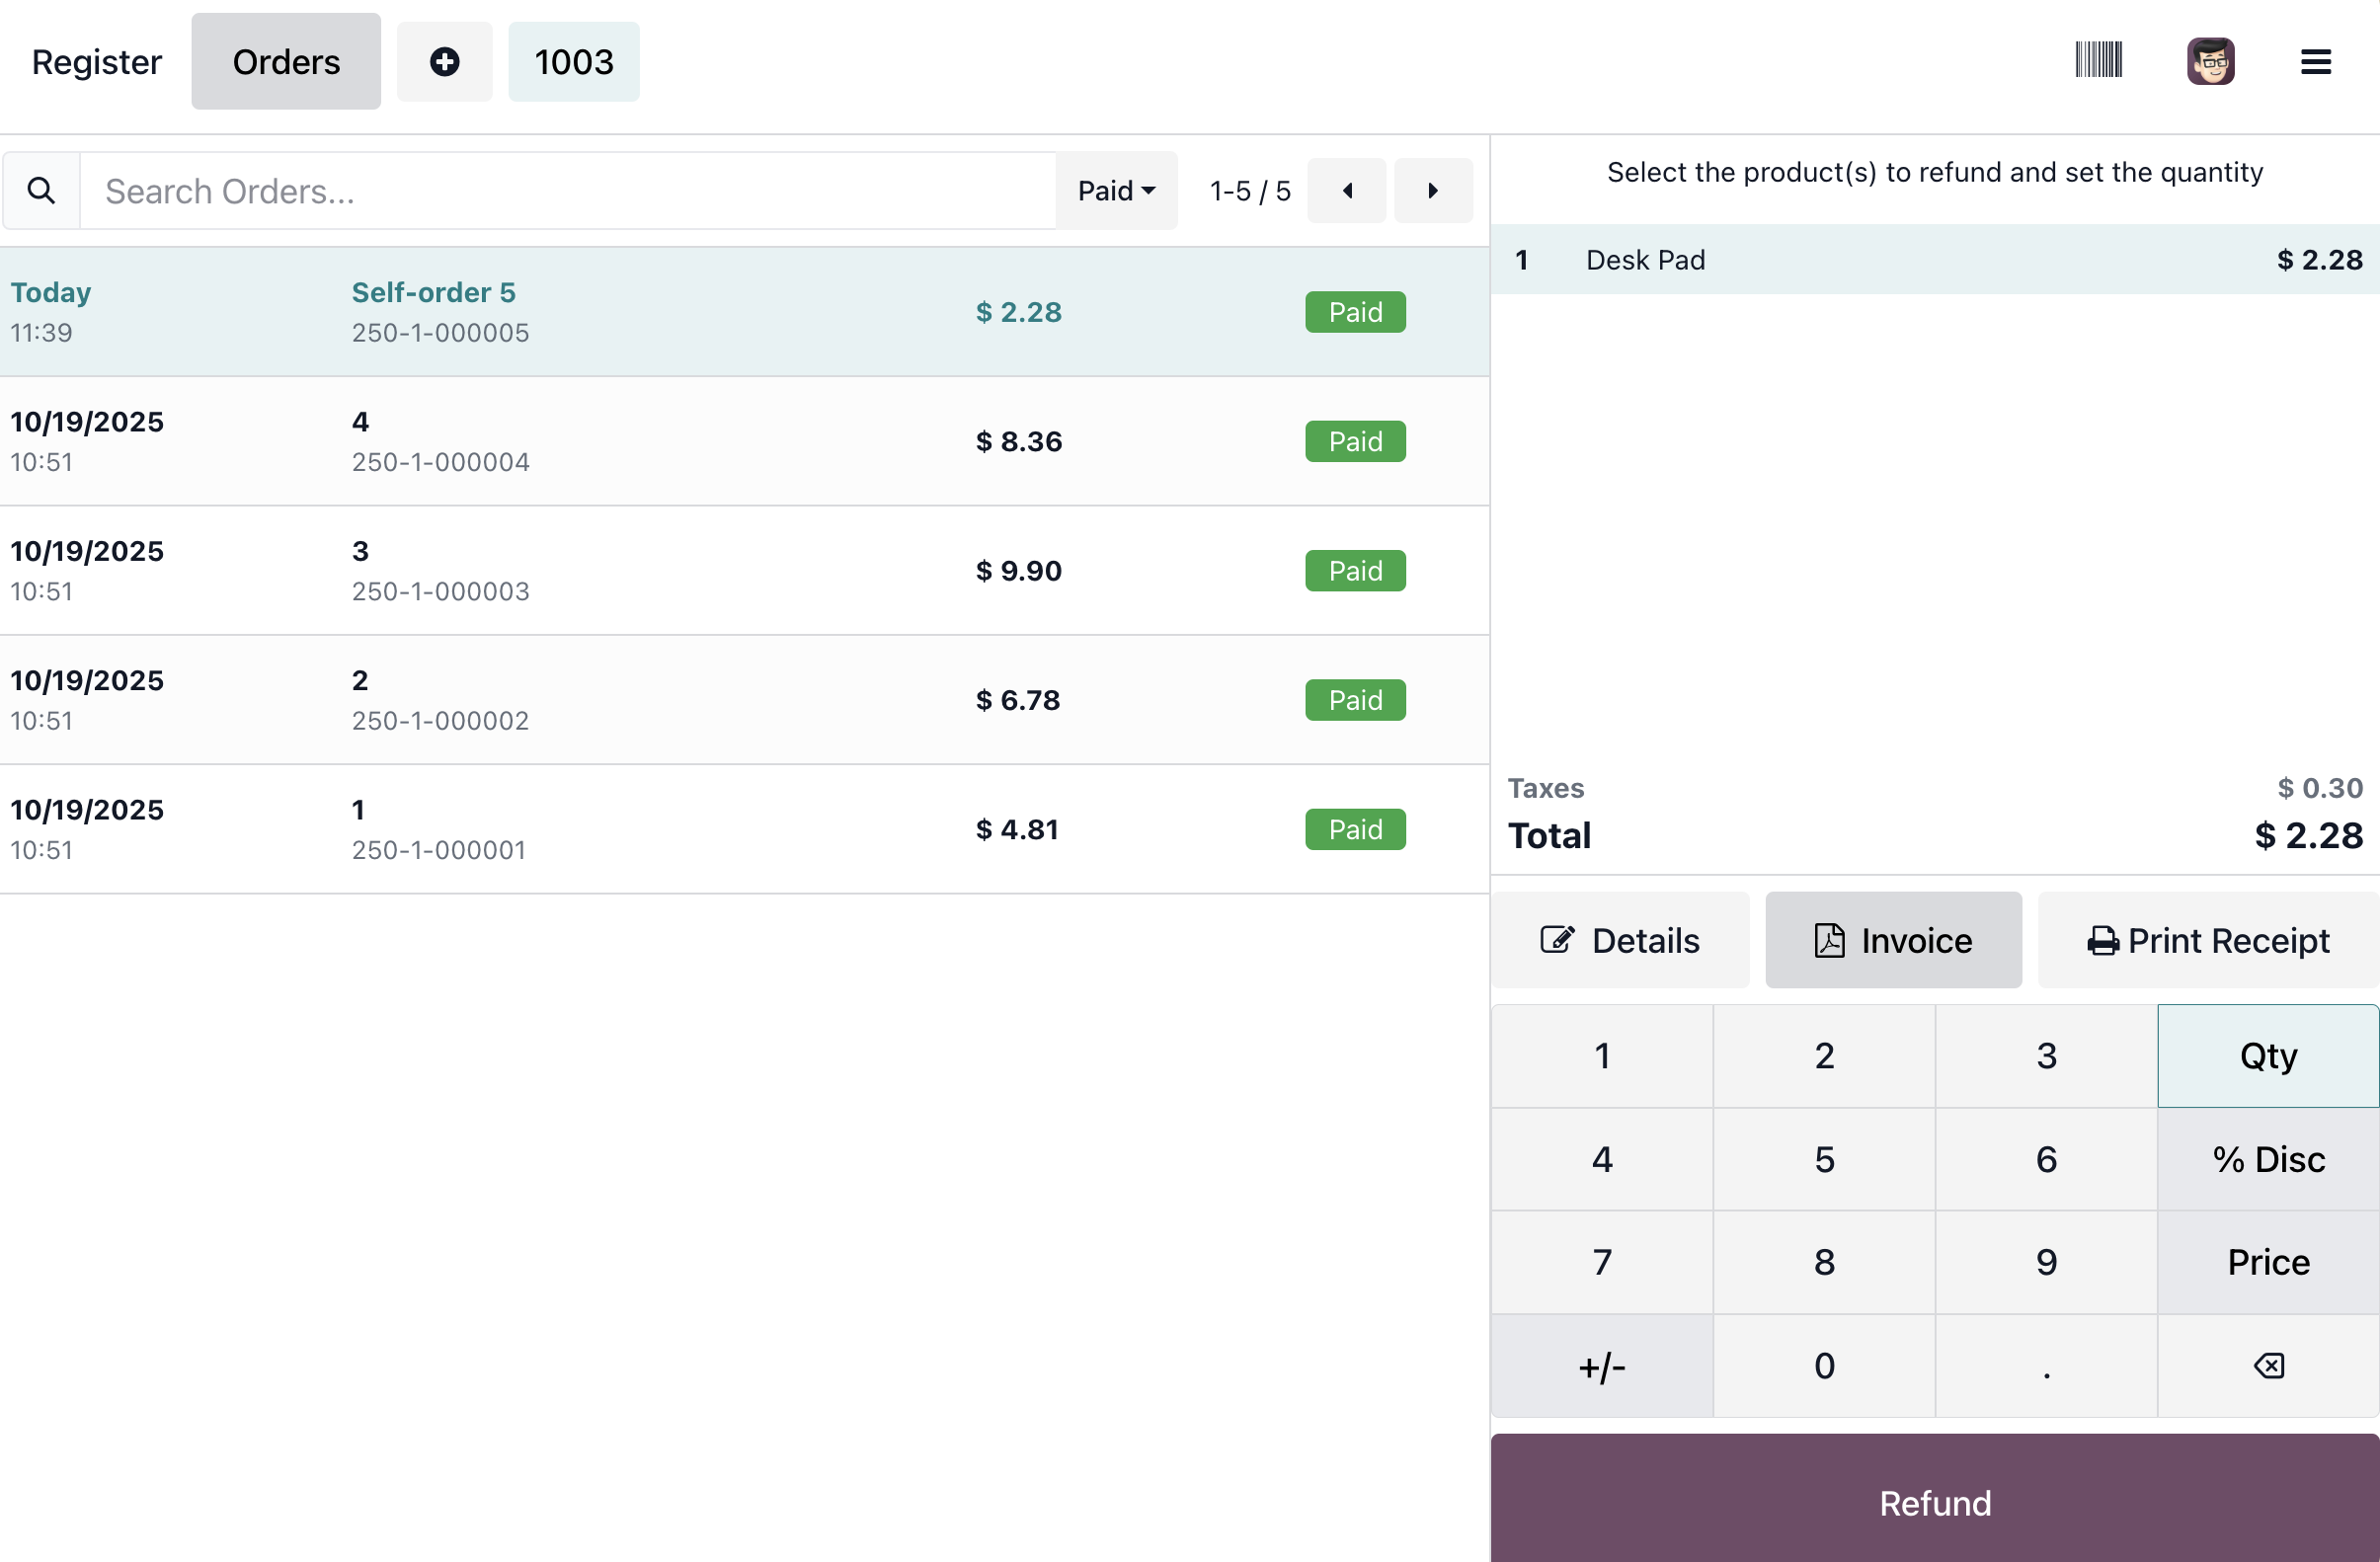
After the default journal is configured, users can invoice the customer from the POS frontend.
Backend Invoicing
Users can also create an invoice from the POS backend. Go to Point of Sale > Orders > Orders, find the order that needs invoicing, and click the invoice button.
QR Code Invoicing
Customers may also scan the QR code on the receipt to request an invoice. After scanning, they fill in the required information, click the invoice button, and download the invoice.
This chapter covered POS receipt configuration and POS invoicing. The next chapter explains payment methods, which determine how cashiers collect money during checkout.